Friday, December 30, 2011

My Year


So 2011 is coming to a close and I feel like it's been the happiest year of my life to date. I graduated college, got married to my best friend, traveled around Italy, got an awesome job cooking vegetarian food at an incredible food co-op, and started this blog. So many other wonderful things happened this year and I can only look forward to the many more experiences that life will throw at me. I figured that I would post a few of my favorite photos from this year for you to enjoy. Have a happy new year.

 
From flowers and a wedding, to gelato at the Trevi Fountain, this summer was by far my most exciting of my life.

I was inspired by the architecture and colors of Rome....
...and fell in love with the simple way of living and eating.


I was left breathless by the beauty in Amalfi...
 
...and found peace in the mountains of Campania.

And my heart will forever hold a place for a dear little town called Calitri.
I know this year will bring many more beautiful things of its own, including lots of wonderful food to share on this site. I am beyond excited. But is it strange that I'm just a bit sad to see 2011 slip away? I guess that is how life goes.


For more fabulous food and photos from Nourish The Roots, 
be sure to follow on Facebook, Instagram, and Pinterest


Sunday, December 18, 2011

Mixed Greens with Pea Shoots and Pomegranate

I am grateful for many things. This year has brought so many wonderful memories and special times. Now that the air is crisp, Christmas lights are twinkling, and carols are being sung, I take the time to reflect on the wonderful people, places, events, and other gifts that my life has been blessed with. While at times I can get discouraged and stressed, it's so important to take a moment and be grateful for the little things that bring joy to my life on a daily basis.
This little salad was one of those things that made me smile today. Yesterday, my wonderful husband went to the farmers market while I was at work and surprised me with these lovely local mesculin greens and pea shoots. Boy does he know how to make a girl smile. These babies aren't exactly cheap, but they sure are beautiful. Their crispness, color, and freshness was so welcomed on this cold and blustery winter day. I decided to simply dress them with a meyer lemon vinaigrette and top with antioxidant-rich pomegranate seeds.
I didn't add too many other ingredients to the salad only because I really wanted to savor the purity of the salad greens and pea shoots. I also thought it was  quite festive, given the green and red colors that are so present right now. Merry Christmas to you all and may you remember to be grateful for the small things that make you happy to be alive.

Mixed Greens with Pea Shoots and Pomegranate

3 cups mixed greens, such as mesculin mix
1 large handful pea shoots or another sprout
1 pomegranate, deseeded
zest and juice of one meyer lemon
3 tablespoons extra virgin olive oil
sea salt, to taste

In a large salad bowl, combine greens and pea shoots. In a small jar, add lemon juice and zest, olive oil, and a pinch of salt. Shake the jar well and then pour the dressing on the greens. Toss gently and top with pomegranate seeds.


For more fabulous food and photos from Nourish The Roots, 
be sure to follow on Facebook, Instagram, and Pinterest

Wednesday, December 7, 2011

Ginger Pecan Pumpkin Bread

It's been awhile since I've posted. Thanksgiving came and went. Now it's December and beginning to feel like Christmas time. It's quite lovely. What's also lovely is the marvelous spiced aroma that fills the house when this pumpkin bread is baking in the oven. My sister came to visit me for the weekend and we had fun putting this little bread together.
I used a pretty special squash for this bread. It's called a red kuri squash. I could have easily used a pie pumpkin, but I couldn't resist the beauty and uniqueness of this particular squash. To make the pumpkin puree, all I did was half the squash, scoop out the seeds, and lay cut-side down in a baking pan with about an inch of water. I roasted it at 400 degrees for about 40 minutes, or until it was soft. After letting it cool, I scooped out the creamy orange flesh and put it through a food processor to make it extra smooth.

Ginger Pecan Pumpkin Bread (adapted from Jenny's recipe at food52)
2 1/2 cups whole spelt or whole wheat flour
1/2 teaspoon baking soda
1 teaspoon baking powder
1 teaspoon salt
2-3 teaspoons ground cinnamon
1 teaspoon ground ginger
1/2 teaspoon freshly ground nutmeg
1 egg
1 cup pumpkin puree
1/2 cup rapadura or raw sugar
1 stick organic butter
1/4 cup  blackstrap molasses
1/4 cup pure maple syrup
1/2 cup plain yogurt
1 1/2 cups chopped pecans
1 tablespoon chopped fresh ginger
1 teaspoon vanilla extract
2 tablespoons raw pumpkin seeds

1. Preheat the oven to 350 degrees and butter a 9" x 5" loaf pan.

2. In a large bowl, combine the flour, baking soda, baking powder, salt, cinnamon, ground ginger, and nutmeg.

3. In another bowl, whisk together the egg, pumpkin, brown sugar, butter, molasses, maple syrup and yogurt until well combined. Add the fresh ginger and vanilla extract to the wet ingredients and mix well.

4. Pour the wet ingredients into the dry ingredients, add the pecans, and stir until just combined (do not overmix). Pour the batter into the prepared loaf pan. Top with pumpkin seeds. Bake 45-55 minutes, or until a toothpick comes out clean. Let the bread cool in the pan for about 10 minutes, then remove to a wire rack to cool completely.


For more fabulous food and photos from Nourish The Roots, 
be sure to follow on Facebook, Instagram, and Pinterest

Sunday, November 20, 2011

Purple Broccoli


Look what I picked up today at the market! Local and organic purple broccoli! I've seen purple cauliflower before, but I've never seen purple broccoli. Isn't it gorgeous? I'm sure it's super high in antioxidant anthocyanins, thanks to its beautiful purple color. These nutrients in colorful fruits and vegetables are vital to our health and combat free radicals in our bodies. They also are known to prevent cancer and premature signs of aging. I can't wait to enjoy my purple broccoli later on!


For more fabulous food and photos from Nourish The Roots, 
be sure to follow on Facebook, Instagram, and Pinterest

Wednesday, November 16, 2011

Thai Spiced Butternut and Carrot Soup

 I'm in love with the color of this soup. It's so beautifully bright and definitely stands out during this cloudy dreary weather we've been having. And it has a surprising, yet mellow kick from the the Thai red curry paste and ginger. Did I mention that it's also an absolute breeze to put together? I can totally see this as a starter for Thanksgiving.
The bright red curry paste, and vibrant orange from the carrots and butternut squash, combine to make an almost neon orange color soup. We all know how fresh, brightly colored fruits and vegetables are loaded with antioxidants, so eat up!
 Winter squashes, like the butternut, are packed with nutrients that we definitely need during these colder months. They're quite affordable and adaptable, too. While I still miss my summer vegetables dearly, I welcome the winter ones. Here's to many more healthy squash recipes.

Thai Spiced Butternut and Carrot Soup (makes at least 8 servings)

1 large butternut squash, peeled, seeded, and chopped in 1-2" cubes
4 carrots, sliced
1 large yellow onion, diced
1 tablespoon coconut oil or butter
sea salt
1-2 tablespoons Thai red curry paste, or more to taste
1 tablespoon grated fresh ginger
5 cups vegetable broth or water
1 cup coconut milk
cilantro for garnish

1. In a large soup pot over medium heat, saute onions in coconut oil with a large pinch of salt until they begin to soften, about 4 minutes. Then, add cubed squash, sliced carrots, and vegetable stock.

2. Add the grated ginger and bring to a boil. When the soup begins to boil, reduce heat and cover. Simmer for about 15 minutes, or until the squash and carrots are fork tender.

3. Turn off the heat, and stir in the red curry paste. It will pretty much dissolve in the soup. Then, puree the soup with an immersion (or regular) blender or food processor until the soup is very smooth. Taste and add salt if needed.

4. Stir in the coconut milk and serve. Top with cilantro and a bit more coconut milk if you wish.

For more fabulous food and photos from Nourish The Roots, 
be sure to follow on Facebook, Instagram, and Pinterest

Sunday, November 13, 2011

Cranberry Apple Crisp


 I honestly cannot believe how fast November is flying by. It seems like it was yesterday that I was basking in the sunshine in Italy, eating Caprese sandwiches and gelato. Oh, how I miss it. Well, at least I have Thanksgiving and all of the seasonal deliciousness that comes along with it to look forward to.
 
Every year on Thanksgiving, my dad makes a cranberry apple pie. I look forward to this all year long and it's seriously one of my all-time favorite desserts. The sweet-tart combination of the apples and cranberries is perfection. I didn't have the patience to make a pie crust for this dessert, so I put together a simple, yet oh-so-delicious crisp with some freshly picked apples and beautiful ruby cranberries.
If you've never had this combination of fruits, there's no better time like the present when both are perfectly in season. And there's nothing better than the smell of caramelizing apples and cranberries baking in the oven while the cool autumn wind is blowing outside. Enjoy.
 

Cranberry Apple Crisp

For the filling:
6 large apples, peeled, cored, and sliced
1 1/2 cups fresh cranberries
2 tablespoons whole wheat flour
2 tablespoons sugar (optional)

For the Topping:
3/4 cup whole wheat flour
3/4 cup rolled oats
1/2 cup raw sugar
2 tablespoons pure maple syrup
7 tablespoons unsalted butter, diced (just shy of one stick)

1. Preheat oven to 375. In a 9"x13" glass baking dish, combine sliced apples and cranberries. Sprinkle with flour and sugar (if you're using the sugar) and toss to coat the fruit.

2. In a large mixing bowl, combine all of the topping ingredients with clean hands until the mixture looks a bit like thick cookie dough and the butter is fully incorporated.

3. Take handfuls of the crumble mixture and flatten it with your fingers and lay over the apples and cranberries in the baking dish. Distribute the topping until the fruit is mostly covered by the crumble mixture. It's ok if there are areas where the fruit is uncovered.

4. Bake for 40-50 minutes until the fruit is bubbling a lot and the topping is golden brown. If the topping is getting too brown, lower the heat to 350 for the remainder of the baking. Let cool briefly before serving to allow the filling to set a bit.

For more fabulous food and photos from Nourish The Roots, 
be sure to follow on Facebook, Instagram, and Pinterest

Thursday, November 3, 2011

Miso-Curry Delicata Squash

 I'm always looking for new and exciting ways to use winter squash. After all,  there are so many types in season right now and they're relatively cheap and full of vitamins. This particular recipe is by far one of the best squash recipes I've ever made and it's all thanks to my lovely new cookbook by my favorite food blogger. Yes, this dish is from Super Natural Everyday by Heidi Swanson. It's a charming cookbook with unique and healthy vegetarian recipes on every page, along with some beautiful photographs. This week, I've been cooking from the book exclusively, and eating dinner every night has been pretty exciting.
This recipe uses delicata squash, which has edible skin, meaning that there is no peeling required. And the miso-curry sauce that bathes the vegetables is so delicious that I found myself licking it off the spoon. This was my first time using red Thai curry paste, and honestly, I think it will be a new staple in my kitchen. Now, I'm a girl that does not like spicy foods and believe me when I say this: this is not a spicy recipe. It's full of flavor without the burn. It's simply perfection, if you ask me.
 Heidi's recipe calls for tofu, but I tend to stay away from tofu. I added some butternut squash to the mix (I had a tiny one that I wanted to use). She also uses extra virgin olive oil, while I used coconut oil instead and absolutely loved the results. Also, I mixed both white and red miso pastes because I had both. I will leave you with her exact recipe here, but know that it can be slightly tweaked to your liking.

Miso-Curry Delicata Squash (from Super Natural Everyday by Heidi Swanson)

12 ounces delicata squash
1/4 cup extra virgin olive oil
1/4 cup white miso
1 tablespoon red Thai curry paste
8 ounces extra firm tofu, cut into small cubes
4 medium new potatoes, unpeeled, cut into chunks
2 tablespoon fresh lemon juice
1 1/2 cups chopped kale, tough stems removed
1/3 cup tasted pumpkin seeds
2/3 cup chopped fresh cilantro

1. Preheat oven to 400 degrees with a rack in the middle of the oven.

2. Cut the delicata squash in half lengthwise and use a spoon to clear out all of the seeds. Cut into 1/2- inch thick half moons.

3. In a medium bowl, wisk together olive oil, miso, and curry paste. Combine tofu, potatoes, and squash in a large bowl with 1/3 cup of the iso-curry paste. Use your hands to toss well and then turn the vegetables onto a rimmed baking sheet and arrange in a single layer.

4. Roast 25-30 minutes, until everything is tender and browned. Toss once or twice along the way to prevent burning. Keep a close watch, though; the vegetables can go from browned to burned in a flash.

5. In the meantime, whisk the lemon juice into the remaining miso-curry paste, then stir in the kale until coated.

6. Toss the roasted vegetables gently with the kale, pumpkin seeds, and cilantro. Serve family style in a large bowl or on a platter.


For more fabulous food and photos from Nourish The Roots, 
be sure to follow on Facebook, Instagram, and Pinterest

Thursday, October 27, 2011

Whole Grain Apple Cinnamon Muffins

We went apple picking a few days ago. The weather was perfectly crisp, and since it was a weekday, we pretty much had the entire orchard to ourselves. The sad part was that I accidentally left my camera at home, so I couldn't take pictures of the beautiful fall colors. I'm still so bummed about this. But we picked a nice big bag of various heirloom variety apples and bought a freshly made half gallon of apple cider and now I'm loving that I can bake up something special.
I'm starting to really enjoy trying different types of flours and sweeteners, and these muffins reflect that. I made them with half spelt flour and half oat flour. To make the oat flour, I just put whole oats in the food processor and pulsed until I got a flour consistency. So easy, really.
And as far as the sweeteners go, I used Rapadura sugar and then added a touch of pure maple syrup. Rapadura sugar is unbleached and unrefined. It is the only sugar where the sugar stream is not separated from the molasses, helping to retain most of its essential nutrients, vitamins, and minerals. Basically, it's the pure juice extracted from the sugar cane, which is then evaporated over low heat. The unique process gives the sugar a mild, caramel-like flavor that is perfect for baking. I topped the muffins with some raw turbinado sugar, though, because I'm really fond of the sweet crystal crust that it lends to baked goods.

You can absolutely make these muffins with whatever flour or sugar you have on hand and I guarantee that they will come out perfectly, so don't feel tied down by my particular ingredients. Just know that they are the perfect muffin to wake up to on a crisp fall day and perfect to use up some beautiful seasonal apples.

Whole Grain Apple Cinnamon Muffins (makes about 15 muffins)

1 cup whole spelt flour
1 cup oat flour
1 teaspoon baking powder
1 teaspoon baking soda
1/4 teaspoon salt
1 tablespoon cinnamon
1/2 cup (1 stick) unsalted butter, melted
3/4 cup rapadura or turbinado sugar
2 tablespoons pure maple syrup
1 large egg, lightly beaten
1 cup (8 ounces) plain yogurt
2 large apples, peeled, cored, and coarsely chopped

1. Preheat the oven to 450°F. Mix together the flours, baking powder, baking soda, salt, and cinnamon in a bowl and set aside. In a separate bowl, mix the butter,1/2 cup of the sugar, and maple syrup together. Add the egg and mix very well. Then, mix in the yogurt gently.

2. Stir in the dry ingredients and fold in the apple chunks. Divide the batter evenly among the prepared muffin cups, sprinkling the remaining 1/4 cup sugar on top.

3. Bake for 10 minutes, turn the heat down to 400°F, and bake for an additional 5 to 10 minutes, or until a toothpick inserted into the center of a muffin comes out clean. Enjoy them fresh from the oven, but they will also keep well for a few days in an airtight containers at room temperature.


For more fabulous food and photos from Nourish The Roots, 
be sure to follow on Facebook, Instagram, and Pinterest

Wednesday, October 19, 2011

Garlic Dill Pickles


I have ventured into a whole new realm of healthy food preparation and it is so awesome. Ladies and gentlemen, I have successfully created my first batch of lacto-fermented pickles! And they are absolutely delicious and probably the easiest thing to make. Seriously, they're super easy. And they're super healthy, too! I went to the farmers market a few weeks ago and watched a woman do a demonstration about making these pickles. I've wanted to make these for awhile (reading food blogs makes you want to make a lot of things). But after learning how easy it truly was while watching the demonstration, I knew I had to do it immediately.
Now what is lacto-fermentation and how on earth are pickles healthy? Well,these pickles are made sour not by vinegar, but by natural beneficial bacteria. Lacto-fermentation happens when the starches and sugars in vegetables and fruit convert to lactic acid by a friendly lactic-acid producing bacteria. Basically, fermented vegetables will give you the same digestive and immune system boosting benefits of cultured yogurt with the added bonus of vitamins, which dramatically increase during the fermenting process. Lacto-fermentation is the old fashioned way of making pickles, and boy are these pickles tasty.
I realize that I should have posted this recipe a few weeks ago when cucumbers were abundantly in season, but you probably can still find some pickling cucumbers around. If you can't find any, just bookmark this recipe and make them next summer. I apologize for my lack of 'keeping with the seasons'.

I am definitely not a lacto-fermentation expert, so if you make these, consult google and other blogs for more expertise and detail. Just know that after a few days, the water will turn cloudy and foamy and the cucumbers will start to look a little dull in color. You may see bubbles and you may even see some slime form on the top of the water. Do not be afraid, though! As long as your pickles and brine smell good, you'll be fine. I was a little nervous when my pickles looked a little funny, but after researching and tasting them, I knew they were fine. They tasted fantastic. Now, if yours smell a little off, this probably means your brine is contaminated with some unfriendly bacteria, so toss them and try again.

Garlic Dill Pickles

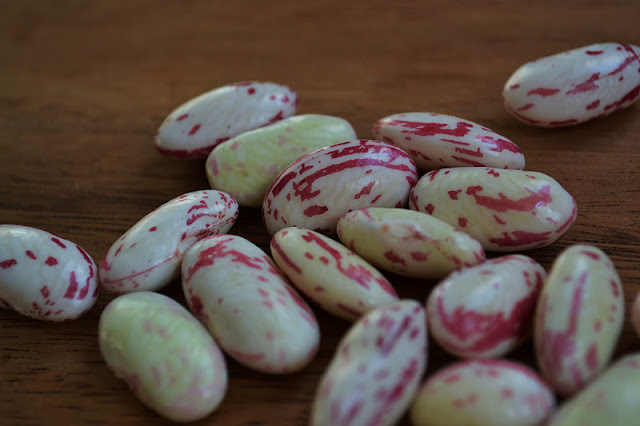
4-5 kirby cucumbers (pickling cucumbers), washed very well and quartered lengthwise
1 small bunch of fresh dill, flowering dill, or dill seeds (not dried dill weed)
3-4 large cloves of garlic, sliced
1 tsp whole peppercorns
1 1/2 tablespoons unrefined sea salt or pickling salt (not iodized salt)
2 cups filtered, purified, or distilled water
1 quart size jar with lid, cleaned and rinsed very well

1. Put garlic, peppercorns, and dill in the bottom of the jar. Add the cucumbers vertically until they all snugly fit into the jar. Make sure they're in there nice and snug! Be sure there is about 1 1/2-2 inches of space between the top of the cucumbers and the opening to the jar.

2. In a pitcher or bowl, add the salt and water and stir very well until the salt has dissolved. This is your brine.

3. Pour the brine into the jar over the cucumbers until the they are completely submerged in brine. You don't want any cucumbers poking out of the brine. The salty water keeps bad bacteria from gorwing and promotes good bacteria to multiply.

4. Place the lid on the jar. Let the jar sit out on your countertop for at least 3 days. I made a great batch by leaving them our for 5 days. They were nice and sour. But time will vary and all you need to do is taste them to see if they're sour enough. When they're to your liking, put the jar in the refrigerator and they keep really well for quite awhile.


For more fabulous food and photos from Nourish The Roots, 
be sure to follow on Facebook, Instagram, and Pinterest

Tuesday, October 18, 2011

Roasted Butternut Squash Risotto


It's fall and it's squash season. So that means it's time to make butternut squash risotto.  I really needed this comforting bowl of risotto this week and it totally hit the spot. Now, I normally prefer to stick with whole grains when I cook. Arborio rice isn't exactly a whole grain. But how can I resist this starchy Italian rice that turns into a beautiful creamy bowl of goodness?  I've actually made a risotto with barley before, which was quite good, and I will be sure to share that with you soon. But in the meantime, go make yourself this indulgent meal. Pour yourself a glass of wine while you're at it.

Butternut Squash Risotto (serves 2 as a main dish and 4 as a side dish)

1 butternut squash, peeled and cut into 1/2 inch cubes
2 tablespoons olive oil
sea salt
6 cups vegetable broth
2 tablespoons butter
1 yellow onion, finely chopped
2 cups Arborio rice
1 1/2 cup dry white wine
1 cup freshly grated Parmesan cheese

1. Preheat oven to 375. Lay the cubed butternut squash on a baking sheet (I line mine first with parchment paper, making for an easy cleanup). Drizzle with olive oil and toss to coat the squash evenly. Sprinkle with sea salt. Bake for about 20 minutes or until the squash is soft.

2. Pour the vegetable stock into a saucepan and bring to a low simmer.

3. Meanwhile, in a separate large pot, saute the onion in butter with a pinch of salt until nicely softened. Then, add the rice and stir until it's coated in the butter, about 2 minutes. Add the wine. Pour yourself a glass while the bottle is open.

4. When the wine is almost fully absorbed by the rice, add a ladle-full of warm vegetable stock. Continue to stir until absorbed. Add another ladle full and repeat until all of the stock is used up and the rice is cooked through. If you need more liquid to cook the rice thoroughly, adding water will be fine.

5. Add the cubed butternut squash to the risotto and stir to combine. Stir in the Parmesan cheese and serve right away.


For more fabulous food and photos from Nourish The Roots, 
be sure to follow on Facebook, Instagram, and Pinterest

Saturday, October 8, 2011

Roasted Corn Pudding in Buttercup Squash

Do you crave something comforting? Something creamy, warm, and cheesy? But something that also isn't horribly bad for you? Enter this squash recipe which should satisfy all of those things. You see, instead of making a comfort food like macaroni and cheese, I made this squash concoction and it hit the spot.
And it also gave me the opportunity to use these pretty buttercup squashes from the market. I was attracted to their pretty skin and they were the perfect size squashes to serve this corn pudding. They're like little squash bowls! I love to stuff squashes like this with lots of different things and I know I'll be making different variations of stuffed squash a lot this autumn. The corn I used in the recipe was fresh off the cob and probably the last of the corn on the cob for the season. I just loved the creamy corn pudding in the sweet squash topped with a nice sprinkling of cheddar cheese. Perfection, I tell you.
Make sure your squash halves lay flat in the pan that you're using, or else the filling will just spill right out of them. Also, you'll probably have some filling left over, so you could either use more squashes or do like I did and put the pudding mixture in a small baking dish and bake it alongside the squash. Either way works.

Roasted Corn Pudding with Buttercup Squash (slightly adapted from Heidi at 101cookbooks)

2 buttercup or acorn squashes, cut in half lengthwise and seeded
1 tablespoon butter or olive oil
1 cup milk (preferably organic)
1 egg plus 2 egg whites
kernels from 2 ears of corn (roughly one cup)
1/2 cup chopped scallions
1/4 tsp sea salt
1 cup shredded sharp white cheddar cheese

1. Preheat oven to 375 degrees. Rub the orange flesh of the squash with butter or olive oil. Place cut side up on a baking sheet, cover with foil, and bake for about 45 minutes. You want to make sure the squash halves lay flat and not tilt, because later when you put the filling in, it will run out.

2. In a bowl, combine the milk, egg and egg whites, corn, half the scallions, and salt. Wisk well. Fill each squash half with the mixture and transfer back into the oven. (If you have leftover filling, bake it in a small baking dish sprinkled with cheese. It's a real treat.) Continue baking squash uncovered for 30-50 minutes longer, or until the squash has cooked through and the pudding has set. At the last minute, sprinkle the top of each squash with cheese and put it under the broiler just until the cheese starts to bubble and brown. Serve squash warm with the rest of the chopped scallions sprinkled over the top.


For more fabulous food and photos from Nourish The Roots, 
be sure to follow on Facebook, Instagram, and Pinterest

Tuesday, October 4, 2011

Cranberry Beans and Ribollita

 
There's nothing more exciting for me than trying new foods. So you can imagine my excitement when I saw these gorgeous cranberry beans at the market and decided to use them in my all time favorite soup. It was my first time using fresh beans (as opposed to dried) and I fell in love. Look at these beans! They're just gorgeous. Call me weird, but when I was photographing them, I got really excited because they looked so damn beautiful.

 Sadly, after cooking the beans, they lose their pretty color and take on the look of a typical white bean. However, they taste great and cook so much faster than dried beans. And they were fun to remove from the pod, so overall it was a good experience and I'm definitely not disappointed.

This soup is just bursting with local and beautiful produce from the farmers market. These carrots had huge green tops, dirt still clinging on them, and the sweetest crunch I'd ever tasted in a carrot. I knew that they were just pulled from the earth. And the lacinato kale with its sexy dark green leaves is bursting with flavor and nutrition. Combine these vegetables together with some other basic ingredients and you get the Italian soup called ribollita. It's a thick and  hearty soup, which makes it filling enough to be a meal in itself. Ribollita traditionally has bread added to it to make it extra thick, but I opted out of that this time and just had some nice crusty wholegrain bread on the side.
Serve the soup with a drizzle of extra virgin olive oil and a shaving of fresh Parmesan or Pecorino Romano cheese and enjoy during this lovely autumn season when the air is getting crisp and the body longs for nourishment and warmth.

Ribollita

3 tbs olive oil
1 large onion, chopped finely
3 large stalks celery, chopped
3 carrots, chopped
4 cloves of garlic, minced
1  small can whole peeled Roma tomatoes (14 1/2 ounce can) or 3 large fresh tomatoes, chopped
2 cups shelled cranberry beans or cooked white cannellini beans
4 cups vegetable broth
1 bunch lacinato kale, chopped into thin strips
sea salt, to taste
Freshly grated Parmesan or Pecorino Romano cheese

1. In a large soup pot, saute onion in olive oil until softened. Add the carrot and celery and cook about 5 minutes.

2. Add the garlic and then add the can of tomatoes. With a wooden spoon, break up the tomatoes into small pieces (unless you're using fresh tomatoes, where you would already have them chopped before adding them to the pot).

3. Add the beans and broth and let simmer for 20-25 minutes or until the beans and vegetables are cooked. Right before serving, add the chopped kale to the pot of hot soup (the heat should be off). Stir the kale into the soup until it's nicely wilted and retains a bright green color. This is a very thick soup,so if you want to thin it out with more broth, you may. Ladle into bowls and drizzle with olive oil and a shaving of fresh cheese. Delicious!


For more fabulous food and photos from Nourish The Roots, 
be sure to follow on Facebook, Instagram, and Pinterest

Tuesday, September 27, 2011

Vegetable Barley and Bean Soup


 The summer is definitely coming to a close and I honestly don't know where it went. It seems like yesterday that we were anxiously awaiting our wedding in July and frolicking through Italy in August and now it's almost October. Damn, I want the summer back. So you can see why I'm squeezing every last bit out of the summer vegetable harvest, yet using it ways that will warm us up as we start feeling that autumn chill in the air. So here's this soup.

I'm so blessed to live within walking distance of an absolutely amazing farmers market that takes place every Saturday. It's become our weekend tradition to get up early and head on over to the market to pick up our fresh vegetables, fruit, herbs, and bread for the week. I love knowing that I'm purchasing the most wholesome food I can buy while also supporting our local farmers who work so hard. This past Saturday, I picked up beautiful cherry tomatoes, green beans, and fresh sage and thyme (among many other things) and figured I'd make a nice soup. We really enjoyed how it came out.

It was my first time using pearled barley in a soup and I think it was a great addition, although you could totally use brown rice or wheat berries. The white wine gives it extra flavor and all of the vegetables and beans make this soup filling enough to be a meal itself. And the leftovers were great, although you may need to add some water or broth to the leftovers because the barley soaked up a lot of broth. So if you're like me and not ready for the summer to end quite yet, here's a nice little soup to gradually welcome autumn. Well, to look on the bright side, autumn equals apple and squash season! How exciting!

Vegetable Barley and Bean Soup (adapted from Green Kitchen Stories)

3 tablespoons olive oil
1 small onion, diced
3 cloves garlic, finely chopped
2 large carrots, chopped into thin rings
2 large celery stalks, chopped
2 bay leaves
2 fresh sage leaves
1 teaspoon fresh thyme leaves
juice from half a lemon
1 cup white wine
6 cups vegetable broth (use more if soup becomes too thick)
1 cup pearled barley
1 zucchini, diced
10 cherry tomatoes, halved
2 cups fresh green beans
1 1/2 cups cooked cannelloni beans (I use dried cannellini beans that I've soaked overnight, drained, then    cooked in fresh water until softened, but you can also use a can, just make sure the beans are rinsed well.)
sea salt, to taste

1. In a large pot, cook onions in olive oil with a pinch of salt until they are nicely softened. Then, add garlic, carrots, celery, bay leaves, sage leaves, and thyme leaves. Cook, stirring often, about 2 minutes. Then add the white wine and stir for another 2 minutes.

2. Add vegetable stock and let simmer for 15 minutes. Then, add barley, zucchini, and tomatoes. Cover and let simmer for 20 minutes.

3. Add green beans and cooked (or canned) cannelloni beans and let simmer for about 8 minutes. Taste and adjust for salt. I used about a teaspoon of salt, but it depends on how salty your vegetable broth is. Serve the soup drizzled with olive oil and perhaps a dusting of Parmesan cheese.


For more fabulous food and photos from Nourish The Roots, 
be sure to follow on Facebook, Instagram, and Pinterest