Tuesday, September 27, 2011

Vegetable Barley and Bean Soup


 The summer is definitely coming to a close and I honestly don't know where it went. It seems like yesterday that we were anxiously awaiting our wedding in July and frolicking through Italy in August and now it's almost October. Damn, I want the summer back. So you can see why I'm squeezing every last bit out of the summer vegetable harvest, yet using it ways that will warm us up as we start feeling that autumn chill in the air. So here's this soup.

I'm so blessed to live within walking distance of an absolutely amazing farmers market that takes place every Saturday. It's become our weekend tradition to get up early and head on over to the market to pick up our fresh vegetables, fruit, herbs, and bread for the week. I love knowing that I'm purchasing the most wholesome food I can buy while also supporting our local farmers who work so hard. This past Saturday, I picked up beautiful cherry tomatoes, green beans, and fresh sage and thyme (among many other things) and figured I'd make a nice soup. We really enjoyed how it came out.

It was my first time using pearled barley in a soup and I think it was a great addition, although you could totally use brown rice or wheat berries. The white wine gives it extra flavor and all of the vegetables and beans make this soup filling enough to be a meal itself. And the leftovers were great, although you may need to add some water or broth to the leftovers because the barley soaked up a lot of broth. So if you're like me and not ready for the summer to end quite yet, here's a nice little soup to gradually welcome autumn. Well, to look on the bright side, autumn equals apple and squash season! How exciting!

Vegetable Barley and Bean Soup (adapted from Green Kitchen Stories)

3 tablespoons olive oil
1 small onion, diced
3 cloves garlic, finely chopped
2 large carrots, chopped into thin rings
2 large celery stalks, chopped
2 bay leaves
2 fresh sage leaves
1 teaspoon fresh thyme leaves
juice from half a lemon
1 cup white wine
6 cups vegetable broth (use more if soup becomes too thick)
1 cup pearled barley
1 zucchini, diced
10 cherry tomatoes, halved
2 cups fresh green beans
1 1/2 cups cooked cannelloni beans (I use dried cannellini beans that I've soaked overnight, drained, then    cooked in fresh water until softened, but you can also use a can, just make sure the beans are rinsed well.)
sea salt, to taste

1. In a large pot, cook onions in olive oil with a pinch of salt until they are nicely softened. Then, add garlic, carrots, celery, bay leaves, sage leaves, and thyme leaves. Cook, stirring often, about 2 minutes. Then add the white wine and stir for another 2 minutes.

2. Add vegetable stock and let simmer for 15 minutes. Then, add barley, zucchini, and tomatoes. Cover and let simmer for 20 minutes.

3. Add green beans and cooked (or canned) cannelloni beans and let simmer for about 8 minutes. Taste and adjust for salt. I used about a teaspoon of salt, but it depends on how salty your vegetable broth is. Serve the soup drizzled with olive oil and perhaps a dusting of Parmesan cheese.


For more fabulous food and photos from Nourish The Roots, 
be sure to follow on Facebook, Instagram, and Pinterest

Sunday, September 25, 2011

Chunky Tomato Salsa

So I realize I haven't posted recipes for complete meals lately. And I guess I'm continuing that trend by posting this recipe for salsa. But this stuff is so amazingly good and pairs so well with so many complete meals that it deserves a complete post dedicated solely to it. I promise to start posting some delicious meals soon. It's not like I haven't been cooking, so expect to see some good food coming soon.


I absolutely adore Mexican food, but I'm not a fan when it's greasy or fried. It doesn't usually have the healthiest reputation, I know. I always go for a vegetarian option when it comes to Mexican food. And honestly, when you make it yourself at home, it's so easy to make Mexican healthy without sacrificing any flavor. Check out my  black bean and quinoa burritos if you don't believe me.
Use this salsa on eggs, on burritos or sandwiches, or mixed in with some rice and beans. It's better than any jarred varieties of salsa I've tried and it's super easy to make. I've made it 3 times in that past 3 weeks, so I guess you can say we've been enjoying it on lots of things.

Chunky Tomato Salsa (makes about 2 cups)

3 large fresh Roma Tomatoes, diced
1/2 of a small red onion, finely chopped (use less if you prefer)
1 large garlic clove, finely chopped
juice of half a lime
1 small red chili pepper or jalapeno pepper, seeds removed and finely chopped (feel free to use more or less)
1 tablespoon tomato paste (optional, but  it makes the salsa texture great and gives it a rich tomato taste)
Lots of fresh cilantro, roughly chopped (I use about 3 tablespoons)
sea salt to taste

1. Put chopped onion, garlic and lime juice in a large bowl with a good pinch of salt.

2. Add the diced tomatoes, chili or jalapeno pepper, and tomato paste. Stir very well to combine. Add another good pinch of salt.

3. Add the cilantro and mix again. Transfer to a jar or another bowl and serve or keep it for up to 1 week in the refrigerator. And it gets even better after a few days of refrigeration as the flavors really meld.


For more fabulous food and photos from Nourish The Roots, 
be sure to follow on Facebook, Instagram, and Pinterest

Thursday, September 15, 2011

Basil Pesto


So what do you do when you have tons of basil? Like so much that all those basil leaves barely fit into your largest colander? Make pesto, of course! Pesto is literally one of my favorite things on the planet. I like it on pasta the best. I have fond memories of my dad making pesto in the summer from basil in his garden. We would eat it on spaghetti. Delicious. But close second is a mozzarella, tomato, and pesto sandwich on rustic whole grain bread grilled to perfection. It's also awesome drizzled onto some of my favorite soups like this one. Oh my goodness, my mouth is watering.
Pesto is traditionally made with pine nuts and that's just fabulous, but have you seen the price of pine nuts lately? Like, it's absolutely insane. So I make mine with walnuts and honestly, it's pretty great. I don't miss the pine nuts at all actually. And my bank account thinks it's great, too.

Basil Pesto

1 very large bunch basil, leaves removed from stems, discard the stems
1/4 cup walnuts
1/2 cup grated Parmesan or Pecorino Romano cheese (or a mix of both)
1 large garlic clove
pinch of sea salt, or more to taste
 1/4-1/2 cup extra virgin olive oil

1. Put the garlic clove and walnuts in a food processor and process until pasty, yet still retaining some graininess. Add the cheese and salt and pulse again.

2. Add the basil leaves (you may have to do this in batches if you have a lot of basil and depending on the size of the food processor). Pulse while drizzling olive oil through the feeder until you have a desired consistency. Some like pesto very creamy and some like it with a bit of texture. I like texture and lots of oil, so that's how I make mine.

3. Taste and adjust for salt and add more cheese if you'd like. Store pesto in an airtight container in the refrigerator for up to a week.

Unfortunately, pesto oxidizes very quickly and you lose the bright green color if you don't put enough olive oil in it. It also helps to put a nice layer of olive oil over the pesto in the container that you choose to store it in. The flavor is not affected by this oxidation, though. It still tastes fabulous, it just may not be super bright green.


For more fabulous food and photos from Nourish The Roots, 
be sure to follow on Facebook, Instagram, and Pinterest


Wednesday, September 14, 2011

Roasted Peppers

You can't beat the sweetness of roasted red peppers. An Italian antipasto platter is incomplete without them and they're awesome on a Caprese sandwich. Now, I've been eating store bought roasted red peppers for awhile now. I buy the ones that are in cute little glass jars that are marinating in some vinegar, salt, and olive oil...no bad ingredients and oh so tasty. Yet these here peppers are out of this world delicious and I don't think I'll ever need to buy them in the jars ever again. They're really simple to make and I've been putting them on sandwiches, in salads, pureeing them into my hummus, and just eating them by themselves. I can't think of a better way to use beautiful peppers from the farmers market. I used red, orange, and yellow sweet bell peppers and they were divine.
 Basically, all you need to do is put some whole peppers in to a hot oven for about 40 minutes until they're blistered and just starting to blacken. Then you take them out, cover with foil, and let sit until they're easy to handle. Then, those blistery skins will slip right off. You then remove the seeds and cut the peppers to your desired size. Marinate them in some olive oil, red wine vinegar, and garlic and you've got something special.

Roasted Peppers (adapted from Deb at smitten kitchen)

Sweet Bell Peppers (red, orange, yellow, or a mix of all three)
red wine vinegar
extra virgin olive oil
sea salt
1 clove finely chopped garlic (optional)

1. Preheat oven to 400 degrees. Put whole peppers on a foil lined baking sheet and bake for 40 minutes, or until they're blistery and really wrinkled and starting to turn black. At about the 20 minute point, turn the peppers with tongs so that they evenly roasted.

2.Remove from the oven and cover them with a piece of foil, making sure that they're nicely covered with no holes for escaping steam. Let them peppers sit all wrapped up for about 30 minutes or so.

3. Remove the foil and peel the peppers. The skins should slip right off. Take the stems off and remove the seeds. Do not rinse the peppers with water, because you will lose all of their flavorful juices. Cut (or just tear them like I do) the peppers to your desired size and serve them or keep in a jar with a 1-2 tablespoons of red wine vinegar, some chopped garlic, and a pinch of salt. You may drizzle them with olive oil before serving, but I don't recommend refrigerating them with olive oil on them because the olive oil will solidify from the cold. They keep up to a week in the refrigerator in a covered jar.

For more fabulous food and photos from Nourish The Roots, 
be sure to follow on Facebook, Instagram, and Pinterest

Saturday, September 3, 2011

Homemade Fig Jam from Mark Bittman

I have decided that someday, wherever I live, I want a fig tree in my yard. I want to be able to pick those lovely fruits whenever I want, just like I did in Italy. You see, we had a fig tree outside of our apartment in Italy and by the time we left, I don't think there was a single ripe fig on that tree because of me. Every time I discovered a nice big juicy one hiding behind one of those cool shaped leaves leaves, I got so excited.

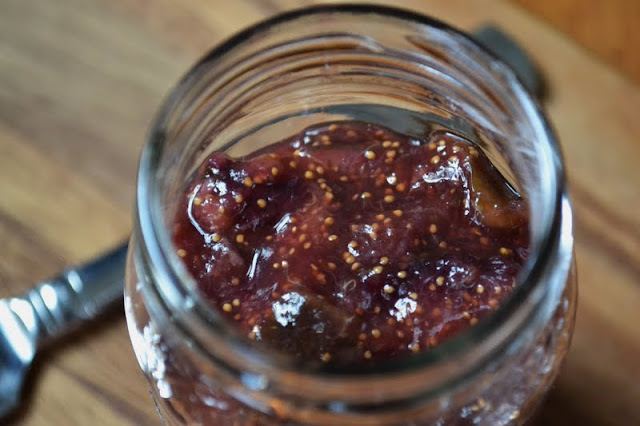
So you can imagine my excitement yesterday when I went to the market and discovered a whole container of perfectly ripe figs just calling my name. I just couldn't say no to their beauty. I brought them home and ate a few with some brie cheese as an afternoon snack and dreamed of something I could use them for. I suddenly thought of how lovely a fig jam would be on a nice slice of toast for breakfast. Soon enough, I discovered this simple recipe on the New York Times site. I left out the refined sugar and replaced it with local raw honey and in less than twenty minutes, I had this fig jam.


Fig Jam (adapted from Mark Bittman of The New York Times)

1 pound fresh figs, stemmed and chopped
4 tablespoons honey (more or less to taste)
1 teaspoon pure vanilla extract
1-2 tablespoons water

1. Combine the figs, honey, and vanilla in a small saucepan. Bring to a boil and add water if it becomes too thick. Adjust heat so mixture bubbles steadily. If it looks too soupy, use a higher heat to reduce it; if there is not much liquid, use lower heat to avoid burning. Cook, stirring occasionally, until mixture is liquid but thick. Turn off the heat. It will thicken up some more once you put it in the refrigerator.

2. Let cool a bit and put in a mason jar or other covered container. Refrigerate for up to a week.


For more fabulous food and photos from Nourish The Roots, 
be sure to follow on Facebook, Instagram, and Pinterest

Friday, September 2, 2011

Heirloom Tomato Salad


Although summer is coming to an end, there are still tomatoes growing on the vines, so I'm taking every opportunity to enjoy them in all of their deliciousness. It's still quite warm outside, so a quick raw tomato salad is a perfect side dish that's really refreshing.


Heirloom tomatoes are really special. I love admiring their shapes, colors, and  flavors. Their flavors are even more pronounced in this salad where they're uncooked, lightly seasoned, and accented with some red onion, raw garlic, a nice zing of vinegar, and some olive oil. Oh, and some fresh basil on top of course if you have any.
Tomatoes remind me of our recent honeymoon in Italy and that makes me happy and sad at the same time. Happy to be reminded of such a beautiful place and beautiful memories, but sad because I long to go back. So, I guess that just means I'm going to sit and enjoy this here tomato salad, close my eyes, and pretend I'm there.

Heirloom Tomato Salad
2 pounds of tomatoes-any size, shape, or color you can find
2 cloves of garlic, minced
1 quarter of a red onion, sliced very thinly
2 tablespoons red wine vinegar
3 tablespoons extra virgin olive oil
Pinch of sea salt
Fresh basil leaves

1. Cut the tomatoes into approximately 2 inch pieces. I like to cut them fairly large in order for them to hold their shape. Put them in a large bowl.
2. Add the garlic, onion, vinegar, olive oil, a pinch of sea salt, and some torn fresh basil. Toss to coat the tomatoes and serve.


For more fabulous food and photos from Nourish The Roots, 
be sure to follow on Facebook, Instagram, and Pinterest