Friday, June 22, 2012

Raw Pad Thai


Yep, I made some raw Pad Thai this week. It looks really pretty right? And those daikon radish noodles are pretty cool. But was it tasty, you ask? Did it taste at all like my favorite Thai dish? Well, it didn't taste at all like my favorite dish a my local Thai restaurant. But it didn't taste bad either. Let's just say, it wasn't quite my taste.
I did enjoy making the raw noodles from daikon radishes. Daikon radishes look like large white carrots. They have a mild radish flavor and are super good for you. I can definitely see myself making raw daikon radish noodles again. They weren't at all hard to make and they seem to take on flavor from a sauce or dressing pretty well. I'd say they're a really healthy alternative to pasta or rice noodles.
As far as this particular sauce, I wasn't too much of a fan. Maybe it's because the coconut milk just seemed too heavy to me. Maybe because it was lacking that sweet and savory flavor of typical Pad Thai sauce that I love so much. I don't know. But if you like creamy coconut sauces, you might just like this one. I'm not bashing the recipe, it just wasn't something that I particularly liked.
So why am I blogging about a recipe I didn't like? Because I realize that everyone has their own tastes and just because I don't particularly like something doesn't mean that no one else will. I also promised I would post some recipes I've tried during my week of being raw, so I didn't want to disappoint. And lastly, I thought the pictures I took of this dish came out nice, and I wanted to share them. Stay tuned for more raw recipes to come!

Raw Pad Thai (adapted from Earthsprout)


Noodles
3 Daikon radishes

1. Peel the daikon radishes. Then, with the vegetable peeler, make noodles of daikon by continuing to peel radish as you rotate it. Put the "noodles" in a large bowl.

Sauce 
1.5 cups Coconut milk
2 tbs Tamari
1 large clove of garlic, minced
½ tsp Himalayan salt
1 small handful of fresh Cilantro, roughly chopped
½ lime, zest & juice

1. Mix all ingredients and pour over the bowl of noodles. Let marinate over night for best result (or at least 1 hour).

Veggies 
1 large carrot
15 small radishes (I left these out of mine)
½ large ripe mango
1 spring onion

1. Rinse, peel and prepare all vegetables and fruits as in the picture.
2. Toss them together with the marinated noodles. Serve with fresh cilantro.


For more fabulous food and photos from Nourish The Roots, 
be sure to follow on Facebook, Instagram, and Pinterest

Wednesday, June 20, 2012

Italian Green Bean Salad and a Basil Plant

This salad reminded me of my trip to Italy. The fresh basil, garlic and tomatoes just hit the spot. Plus, I served it in the bowl I brought back from the Amalfi Coast. So, I guess you can say that I'm feeling a little nostalgic for Italy. Isn't my bowl just gorgeous?
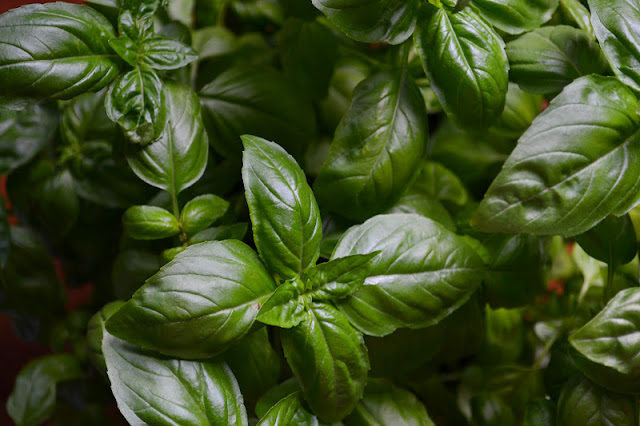
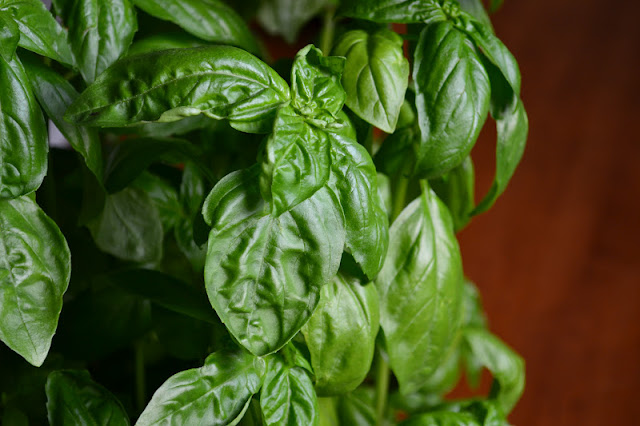
We have added a new plant to our houseplant collection. Meet my beautiful basil plant! I've become very sad over the fact that I have no backyard to have my own garden. You see, we live in an apartment (a very cute one I might add), but we have a nonexistent backyard. Ok, it actually looks like a jungle because our landlord doesn't take care of it at all.  But we have awesome window sills and copious amount of natural sunlight streaming in at all hours of the day, so it's perfect for potted plants. I just love my basil plant. It makes me happy. And it reminds me of Italy. Go figure.
This salad isn't completely raw. I made it last week before I started by raw food experiment. But it can be made raw (just don't blanch the green beans) and be just as good. You can literally throw it together in no time at all and it pairs really well with anything Italian themed. I happened to serve it alongside some whole spelt pasta tossed with farmers market broccoli rabe, olives, garlic, and olive oil. It was perfect.

Italian Green Bean Salad

3 handfuls of fresh green beans, stems removed and cut in 2-inch pieces
3 or 4 fresh Roma tomatoes, cut into wedges, seeds removed if you'd like
3 cloves of fresh garlic, minced
1 tablespoon dried oregano
1 tablespoon dried basil
10 fresh basil leaves, either chopped or left whole
3 tablespoons red wine vinegar
3 tablespoons extra virgin olive oil
sea salt and black pepper to taste

1. Bring a pot of water to a boil. Meanwhile, while the water is coming to a boil, have a large bowl of cold water with ice cubes in it ready. When the water in the pot comes to a boil, add the green beans and let "cook" for about 30 seconds to a minute, or until they're super bright green. Then, quickly drain the beans in a colander and add them directly to the bowl of ice water to "shock" them and lock in their color. Let them sit in the cold water for at least 3 minutes and then drain them.

2. In a large mixing bowl, add the drained green beans, tomatoes, garlic, and herbs. In a small bowl, wisk together the vinegar and oil and then add this to the vegetables. Season with sea salt and pepper or more vinegar to taste. Toss and serve. For best flavor, let marinate for at least an hour before tossing again and serving.


For more fabulous food and photos from Nourish The Roots, 
be sure to follow on Facebook, Instagram, and Pinterest

Tuesday, June 19, 2012

Eating Raw and Collard Wraps

I'm eating raw foods this week. I'm going to try my hardest to eat only raw fruits, vegetables, nuts and seeds for a whole week. Going completely raw is something I've been curious about for awhile. I do eat lots of raw vegetables and fruits on a daily basis already, but I wanted to try being exclusively raw for a week. I figured it's a good time to do it since the temps are heading into the 90's over the next few days, and frankly, I don't feel like cooking in a hot little kitchen. Maybe I'll see some results and feel incredible. Maybe I'll just give my body a nice healthy dose of fresh produce and not feel any different. What I do know is that this isn't a permanent thing. I'm just expanding on my culinary adventures and doing some good for my body this week. A raw food cleanse never hurt anyone. We'll see how it goes! I'll try to post a few of the recipes I'll be making...they're pretty exciting and hopefully tasty.

Oh, and the collard wrap was part of my lunch this afternoon. Basically, I took a large collard leaf, stuffed it with some avocado, herbs, veggies and sprouts, and rolled it up like a burrito. For a super awesome tutorial on how to do it, check out this post. Enjoy! (and wish me luck this week...)


For more fabulous food and photos from Nourish The Roots, 
be sure to follow on Facebook, Instagram, and Pinterest

Monday, June 11, 2012

Breakfast


Oatmeal topped with almonds, walnuts, freshly picked strawberries, blackberries, and a touch of local raw honey. Perfection in my bowl right here. What did you have for breakfast this morning?


For more fabulous food and photos from Nourish The Roots, 
be sure to follow on Facebook, Instagram, and Pinterest

Wednesday, June 6, 2012

Fresh Strawberry, Apricot, and Honey Galette


 Nothing compares to the fragrance and taste of freshly picked strawberries. They're tiny in size, but have some major flavor. My refrigerator is full of these red jewels right now, and I've been dreaming of all the things I can make with them. The first on my list was this galette, and it is quite possibly one of the tastiest things I've baked in awhile. It was the perfect afternoon treat. I'm actually enjoying it immensely as I sit here typing this.
 
 I had picked up some adorable fresh apricots in addition to my heaps of strawberries, and I knew that their flavors would go just beautifully together. If you've never had a fresh apricot, try your hardest to find them and you won't be disappointed. Both of these fruits are packed with vitamin C, fiber, and antioxidants and combining them in this rustic galette is a perfect way to enjoy nature's healthy bounty.
 I made my crust with sprouted spelt flour and it did not disappoint. Many people are afraid to use 100% whole grain flours in pastry crust for fear of it tasting "too healthy" or too dense. Well, I'm quite fond of the healthy and hearty taste that whole spelt flour lends to the crust. It was still very flaky and delicious. In fact, I wouldn't make my crust any other way. But if you prefer, you can mix equal parts of all-purpose flour and whole grain flour instead of using 100% whole grain.

 Fresh Strawberry, Apricot, and Honey Galette

For the filling:
1 pint fresh strawberries, stems removed and sliced
5 fresh apricots, pitted and sliced
2 teaspoons organic cornstarch
3 tablespoons honey
1 egg, beaten

Place the sliced strawberries and apricots into a bowl and drizzle the honey and cornstarch on top. Gently stir the strawberries and apricots until the ingredients are well combined. 

For the Dough  
1 1/8 cup whole spelt flour, plus extra for sprinkling  
1/2 teaspoon sea salt  
1 teaspoon honey  
1/2 cup (1 stick) cold unsalted butter, cut into cubes
3 tablespoons ice water


Preheat the oven to 350 degrees. Line a baking sheet with parchment paper. Combine the flour, salt, and honey. Add the butter,  and work it into the flour with a pastry cutter until they are blended and the butter is in small pieces.  Add the ice water. Mix with your hands until you can form the dough into a ball, adding 1/2 tablespoon or more ice water if necessary. Form into a ball, wrap in plastic and refrigerate for at least 30 minutes.

Sprinkle a clean countertop with flour, put the dough on it, and sprinkle the top with flour. Use a rolling pin to roll with light pressure from the center out to form a circle. Pour the strawberry and apricot mixture inside the center of the pie crust leaving 1-2 inches of crust border. Fold the edge of the dough over the fruit. Brush the dough with the beaten egg. Bake for 35-40 minutes or until lightly browned.

Remove from the oven and let it cool for 10-15 minutes before slicing.


For more fabulous food and photos from Nourish The Roots, 
be sure to follow on Facebook, Instagram, and Pinterest