Thursday, March 28, 2013

Easy Homemade Kombucha

If you told me two years ago that I'd be brewing my own kombucha regularly, I would have laughed in your face. Sure, at that time I loved to drink kombucha and knew about its health benefits, but the thought of making it in my own kitchen scared me. It seemed too complicated. And what if something went wrong? And where on earth would I find myself a starter culture, also known as a "mother", mushroom (because of the way it looks), or SCOBY (symbiotic culture of bacteria and yeast). Yeah, at that time, I was perfectly content with buying bottled kombucha in the health food store and had no desire to make it myself.
Let me back-track a little. Many of you know what kombucha is. You may be avid drinkers of this probiotic tonic. Maybe you, too, make it at home. But I know there are many of you out there who haven't the slightest idea what I'm talking about here. What the heck is kombucha? Why on earth would you drink fermented tea? And why does that mother-scoby-starter culture thingy look like a placenta?! Fear not, my friends, I'm here to explain what this whacky tea is and why I'm obsessed with it.

Now, I don't claim to be an expert on the subject of kombucha. There's something really awesome called Google that can show you the many people in the world who are and they can answer questions about it far better than I ever could (and I link to them at the bottom of this post). So I'll keep it simple here. Basically, kombucha is tea sweetened with sugar, which then gets a starter culture (aka mother, scoby, or mushroom) added to it. This mixture of tea, sugar, and culture then ferments. As it ferments, the culture basically digests the sugar (making the beverage practically sugar-free if feremtned long enough) in the tea. Over time (about 7-10 days) you are left with a probiotic-rich, crazy healthy, and bubbly drink, which tastes a bit like fizzy vinegar. Yup.
Kombucha has been around for over two thousand years. The Chinese called it "the immortal health elixer", and for good reason. Kombucha has crazy amazing health benefits, including the ability to detox the body. It actually contains beneficial enzymes that aid the body through its natural detoxification mechanisms! And because kombucha is teaming with beneficial bacteria and yeast (it's a probiotic beverage), it dramtically aids digestion, which in turn benefits every single part of your body. After all, true nutrition can only be obtained when we have impeccable digestion and healthy gut flora. Because of these properties of kombucha, plus its high antioxidant content, this beverage is most definitely immune-boosting, as well, and can help fight off a wide variety of illnesses and ailments.
I think the best tip I can give you to successfully brew your own kombucha at home is to get yourself a quality symbiotic colony of bacteria and yeast (SCOBY) from a reliable source. I bought mine here in Seattle from a local kombucha-brewing company called CommuniTea and it is healthy, thriving, and producing some awesome kombucha. Another important tip is to use organic tea and organic cane sugar. Your kombucha SCOBY will be using both of these as food, and you want your culture to thrive without any toxic chemicals found in conventional tea and sugar. I use organic gunpowder green tea and organic cane sugar to make my kombucha and the results have been amazing.

Since I don't consider myself an expert on kombucha making, I'm not going to provide my own recipe here. Instead, I'm providing you with links to the most reliable sources for all things kombucha. These resources helped me tremendously when I started my kombucha-brewing journey, and they also provide answers to any and all possible questions relating to the subject of kombucha. You can even buy your own SCOBY online from this well-respected company if you don't have a nearby source for one.

Kombucha Resources:
Kombucha Kamp- This website provides all the information you need to start making your own kombucha. You can even buy your SCOBY from here and a starter kit to help you get started.
CommuniTea-This is the company I bought my kombucha SCOBY from and here is the recipe that they use to make their amazing, traditional, kombucha. A must-read!
Nourished Kitchen- Excellent read about kombucha, plus it provides more links for further reading.
YouTube-Watching videos about kombucha-making finally motivated me to make my own. Just watching videos is enough to greatly boost your knowledge and get you on your way.


For more fabulous food and photos from Nourish The Roots, 
be sure to follow on Facebook, Instagram, and Pinterest

Friday, March 15, 2013

Double Broccoli Quinoa


I want to admit something to you all. Food blogging is work. It's time consuming. It's messy. It's not as glamorous as it may seem. I mean, have you seen some of the gorgeous blogs out there? They're incredible and I strive to do work that's even half as good as them. But the truth is, I'm still learning. And I'm not even close to perfect. The last thing I want you all to think is that my kitchen is spotless all the time and that every meal I make is picture worthy. Because it's not. At all.
First, there's the hilarious sight of me balancing on a kitchen stool trying to get that perfect shot while almost falling face first into the plate of food. Seriously, one day I will come crashing down and break my nose. Typically, when I photograph a recipe, I take about fifty to sixty photos. I go through each one, and delete those that just don't do it for me. I don't even know how to use Photoshop. I should really get on that. All in all,  I probably choose four or five photos for any particular blog post. Yeah, I'm a perfectionsist. And those photos you see here on the blog are what I think are the best.
But that's just the photographing part. If only you could see the mayhem that is my kitchen when I'm putting together a recipe to blog about. There are bowls balancing in dangerous places, plates piled high, and pots on the stove almost burning. There is always a crazy amount of spoons and forks strewn everywhere. Did I mention the amount of dishes I need to wash when all is said and done? Yeah.
The beautiful thing about all of this is that it's all worth it. There's nothing that makes me happier or gets me more excited than taking some really great photos of delicious and healthy food and sharing them with the world. Even if only a teeny tiny percentage of the world ever actually sees them. What gets me motivated for each and every post is the fact that these pictures and recipes are sort of moments in time that get to be preserved and someday perhaps shared at family dinner tables. Or breakfast tables. Or at a desk in an office somewhere. And the food is making people happier and healthier. Or just more inspired to be healthier. The truth is, I love doing this. It makes me feel fulfilled. And it's worth washing all the dirty dishes. It really is.
This post goes out to every single food blogger out there who's balancing on their kitchen stools trying to get great pictures. Okay, maybe only I do that, but whatever. I admire your work more than you'll ever know. And keep doing what you do.
Today, I'm sharing  a recipe from the first food blogger I ever discovered. Her name is Heidi Swanson and she writes 101 Cookbooks, plus she's written two of my favorite cookbooks. She's been an inspiration to me since I first became a blogger and if I could have a fraction of the impact she's had on people's lives in the kitchen, then I'd be happy.  This recipe is really tasty. Plain and simple. And it just screams spring to me with it's vibrant green color. Broccoli pesto is genius, people. I could eat it by the spoonful. I changed Heidi's recipe a bit to fit my needs and tastes and that's reflected here. But the link above the recipe goes straight to the original on her blog.

Double Broccoli Quinoa (adapted from this recipe on 101Cookbooks)
3 cups cooked quinoa*
5 cups raw broccoli, cut into small florets and stems
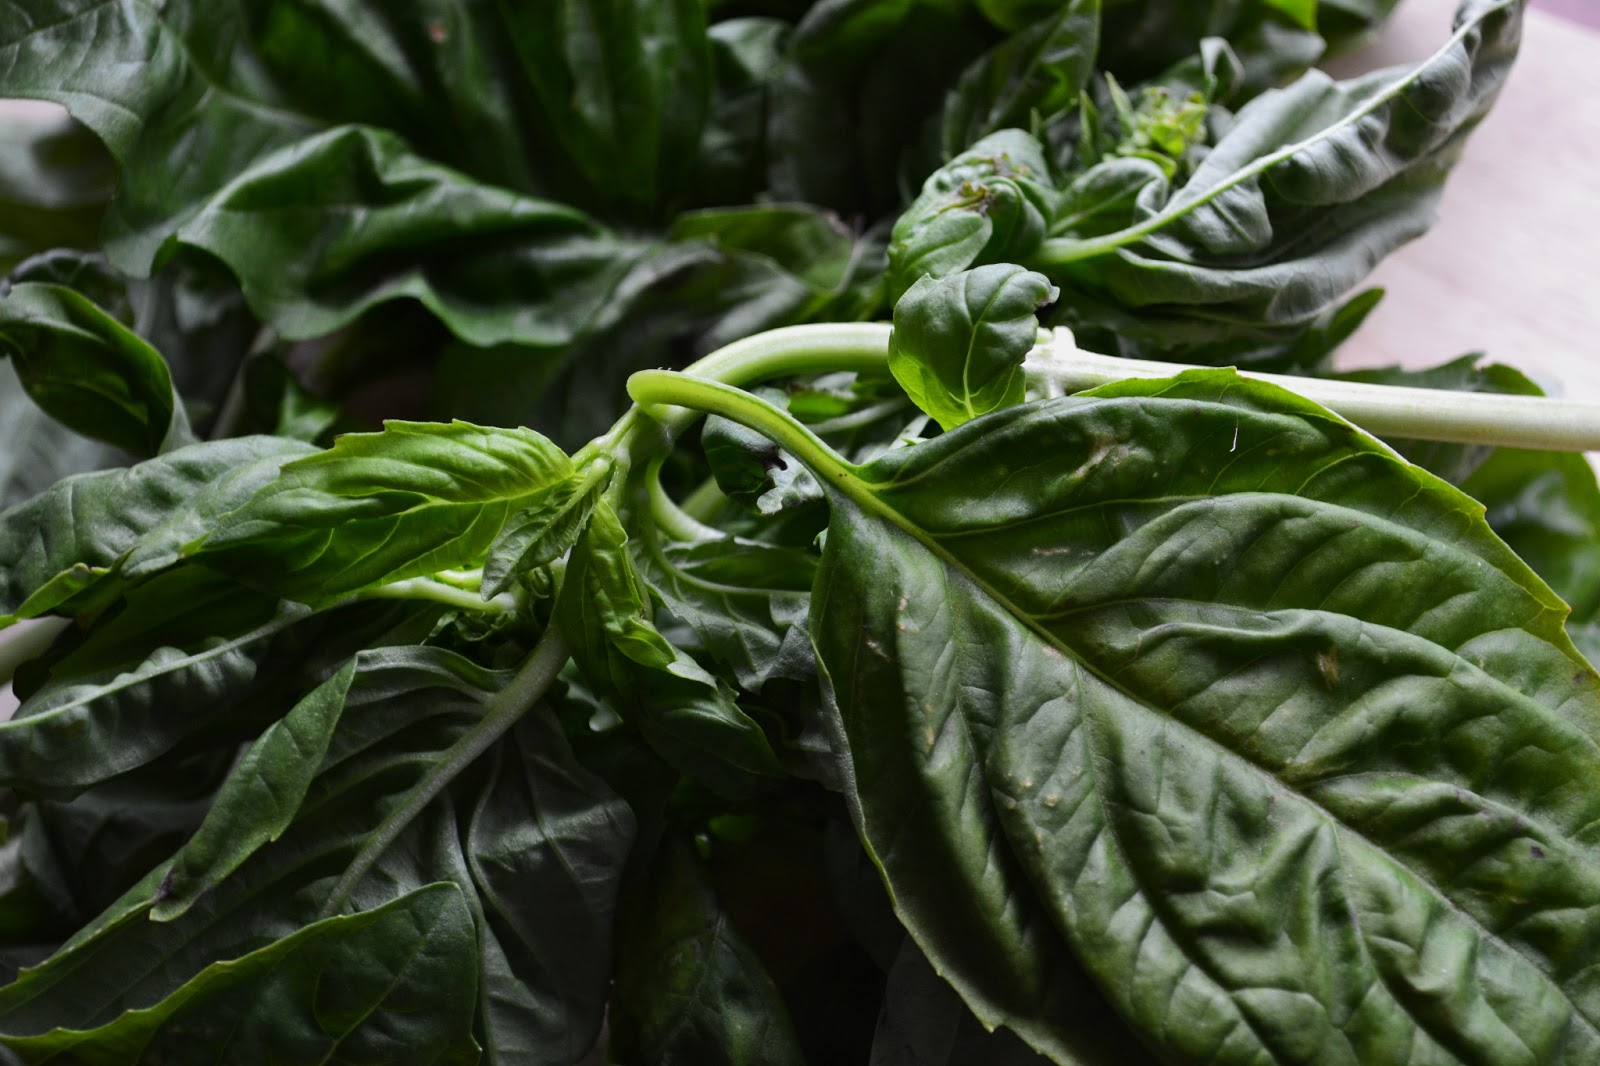
2 cups loosely packed basil
3 medium garlic cloves
2/3 cup walnuts
1/3 cup freshly grated Asiago cheese (Pecorino or Parmesan would work)
2 big pinches salt
2 tablespoons fresh lemon juice
1/4 cup olive oil
Optional (but HIGHLY recommended) toppings: slivered basil, sliced avocado, crumbled feta or goat cheese


1. Barely cook the broccoli by pouring 3/4 cup water into a large pot and bringing it to a simmer. Add a big pinch of salt and stir in the broccoli. Cover and cook for a minute, just long enough to take the raw edge off. Transfer the broccoli to a strainer and run under cold water until it stops cooking. Set aside.

2. To make the broccoli pesto, puree two to three cups of the cooked broccoli, the garlic, 1/2 cup of the walnuts, basil, cheese, salt, and lemon juice in a food processor. Drizzle in the olive oil and proccess until smooth.

3. Just before serving, toss the quinoa and remaining broccoli florets with about the broccoli pesto. Taste and adjust if needed, you might want to add a bit more salt or an added squeeze of lemon juice. Turn out onto a serving platter and top with the remaining walnuts, some sliced avocado, and basil.
Serves 4 - 6.

*To cook quinoa: rinse one cup of quinoa in a fine-meshed strainer. In a medium saucepan heat the quinoa, two cups of water (or broth if you like), and a few big pinches of salt until boiling. Reduce heat and simmer until water is absorbed and quinoa fluffs up, about 15 minutes. Quinoa is done when you can see the curlique in each grain, and it is tender with a bit of pop to each bite. Drain any extra water and set aside.
aside and let cool, then store in refrigerator. Bring to room temp again before using.


For more fabulous food and photos from Nourish The Roots, 
be sure to follow on Facebook, Instagram, and Pinterest

Tuesday, March 12, 2013

Homemade Lacto-Fermented Sourkraut


I'm back with another fermented vegetable! This time, it's a simple sourkraut. I wrote recently about my kimchi experiment, plus all the health benefits associated with fermentation. This time, I'm keeping it simple with a classic kraut. I've been on a fermenting kick lately, even making my own kombucha regularly, which is totally awesome (and will be a whole other blog post soon).
I've been so interested in making all things fermented that I actually took a class last week from an expert, the founder of Firefly Kitchens, Richard Climenhage. Firefly Kitchens is a small company based in Seattle that specializes in making authentic, traditionally fermented vegetables. Their products are sold at farmers markets and local co-ops both in Seattle and Portland.  Everything they make is made with local  produce and is incredibly delicious and super good for you. Right up my alley!
I've said it before and I'll say it again (and I'll probably say it again at some point...) that fermented foods, especially fermented vegetables, are one of the most important things that you can put in your body. The probiotics in these foods are better than any pill you can take and they will boost your health and digestion tremendously. Eating a bit of sourkraut, kimchi, or other fermented vegetable with every meal will drastically improve digestion and assimilation of nutrients in the body. And if you don't want to make your own sourkraut or kimchi just yet, luckily there are plenty of great local companies like Firefly Kitchens to make some for you. Just be sure you're getting these fermented foods in a health food store in the refrigerated section and that they are unpasteurized and raw.
Making sourkraut is possibly one of the easiest fermenting projects to undertake, besides pickles. The following recipe is the one that I've used in the past with a little adjustment based on what I learned from the class. Feel free to adapt the recipe by using purple cabbage, shredded carrots, beets, or any other vegetable. You can even add some caraway seeds to this classic kraut to give it that extra authentic flavor. Have fun with it!

Classic Sourkraut (from Firefly Kitchens)
Ingredients:
1 head of cabbage (3 quarts shredded)
1 1/2 tsp unrefined sea salt (Celtic sea salt, Pink Himalayan, etc...)

Equipment:
1 quart mason jar
large bowl

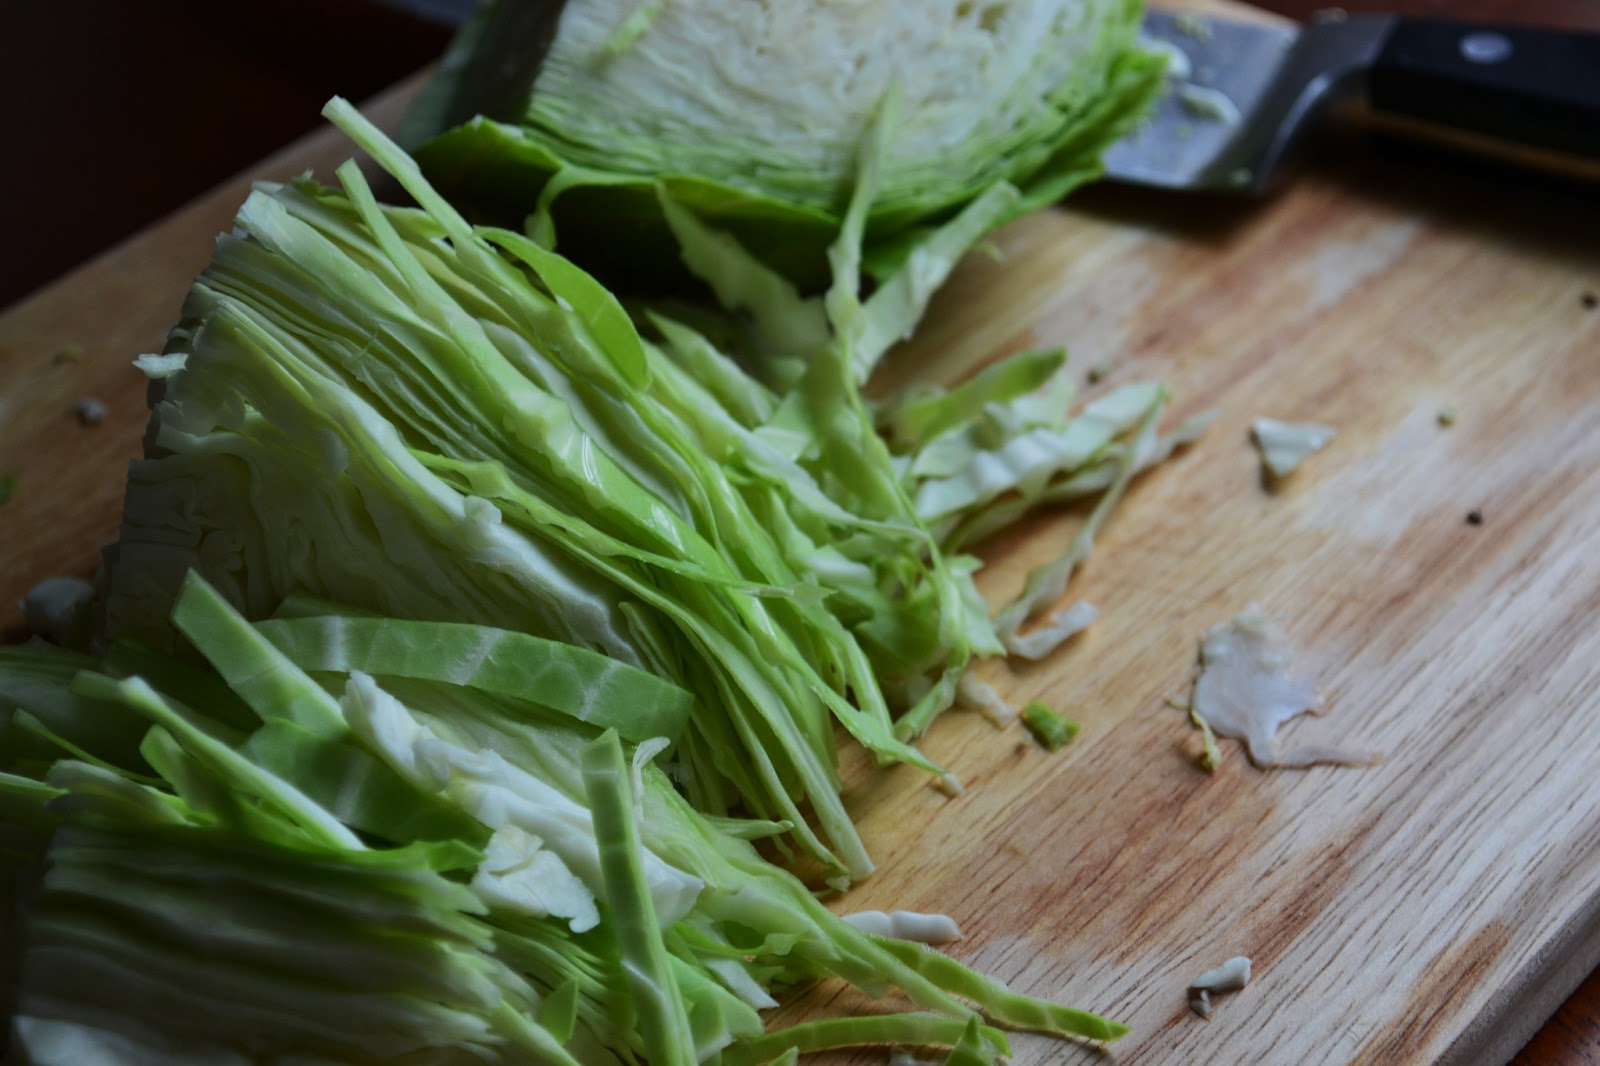
1. Peel off any old, discolored cabbage leaves.  Cut cabbage into quarters and thinly slice into long strips.

2. Place half of the sliced cabbage into a large bowl and add half of the salt. With your clean hands, massage the cabbage until it starts to release water. Add the rest of the sliced cabbage to the bowl with the rest of the salt and massage some more until the cabbage has collapsed a bit and when you squeeze it, water is released.

3. Put the cabbage into the mason jar and push down hard until the cabbage liquid (brine) rises above the compressed mixture. If there is not enough liquid to do this, make a salt water brine of 1 teaspoon salt dissolved into 1 pint of water. Add this brine to the jar until the cabbage is fully submerged.

4. Close lid tightly and allow to sit at room temperature for a least one week and up to six weeks for maximum flavor.

Notes:
-Keep the jar on a plate, as some brine may leak out if it gets high.
-If the brine level goes below the cabbage, add more salt water brine solution.
-Give at least one inch of space at the top of the jar to allow for expansion of gassing from the fermentation.


For more fabulous food and photos from Nourish The Roots, 
be sure to follow on Facebook, Instagram, and Pinterest

Tuesday, March 5, 2013

Roasted Root Vegetable and Quinoa Salad

It's beginning to feel like spring here in the Pacific Northwest. It's the first time in my life that I'm not experiencing a Northeast spring, and I can say it's a little different here. There are daffodils and crocuses and blossoming fruit trees in people's yards already! I just know that my peeps in New York are still waiting for the temperature to climb and the last of the snow to melt. To them, spring is still a ways away. So I guess I'm still feeling winter with all of you Northeasterners, and I'm still into the root vegetables. For now, at least.
This salad was put together on a whim after I picked up some pretty little beets at the farmers market on Sunday. Their vibrant colors reeled me in and I just couldn't resist. I roasted them along with some parsnips, carrots, and onions and tossed the whole mix with quinoa, walnuts, and greens. I wisked up a honey dijon vinaigrette and voila! A grounding, hearty salad to welcome the chilly misty air of early spring. I can imagine this salad being super delicious with some crumbled goat cheese over top, as well. Just a thought.
Root vegetables are incredibly delicious when they're slowly roasted, as the sugars within them caramelize and concentrate. I like roasting a bunch of root vegetables in the beginning of the week and then add them to salads throughout the week. They're a great way to bulk up any meal. And what's even better is that they're packed with nutrition at a very affordable price!
Roasted Root Vegetable and Quinoa Salad

For the Salad:
7 small beets, peeled and cut into cubes
2 large carrots, peeled and cut into cubes
2 large parsnips, peeled and cut into cubes
1 large onion, peeled and thinly sliced
3 cloves garlic, minced
olive oil for roasting
sea salt
1 cup walnuts, lightly toasted in a dry skillet
2 cups cooked quinoa (1 cup dry quinoa yields 2 cups cooked)
1 cup cooked chickpeas
1 large handful cilantro or parsley, roughly chopped
3 handfuls of mixed salad greens

1. Preheat oven to 350. Toss the carrots and parsnips with a few tablespoons of olive oil and a few pinches of salt. Spread them on half of a parchment-lined baking sheet. Toss the beets with olive oil and salt and put them on the other half of the lined baking sheet. (Keeping the beets separate from the carrots and parsnips helps to prevent all of your vegetables from turning red from the beets).

2. Combine the onion and garlic with some olive oil and salt and put them on a separate parchment-lined baking sheet. Put both pans in the oven and roast for about 45 minutes to an hour, or until the root vegetables are tender and the onions are soft. Remove from the oven and let cool slightly.

2.  In the meantime, combine the cooked quinoa, cooked chickpeas, salad greens, cilantro (or parsley), and walnuts in a large bowl. Add the roasted vegetables to the bowl and toss lightly just to combine. Serve on plates or bowls with lots of the delicious honey dijon dressing poured over top.

For the Dressing:
3 tablespoons dijon mustard
2-3 tablespoons white balsamic vinegar or lemon juice
2 tablespoons honey or pure maple syrup
4 tablespoons extra virgin olive oil
a few pinches of salt, to taste

1. While the vegetables are roasting, combine all of the dressing indredients in a bowl. Wisk until the dressing is emulsified. Alternativeley, add all the dressing ingredients to a small mason jar, screw the lid on tightly, and shake well. Taste the dressing and adjust to your liking (add more mustard, more honey, more olive oil, etc...) Pour the dressing over the finished salad and enjoy!


For more fabulous food and photos from Nourish The Roots, 
be sure to follow on Facebook, Instagram, and Pinterest

Thursday, February 28, 2013

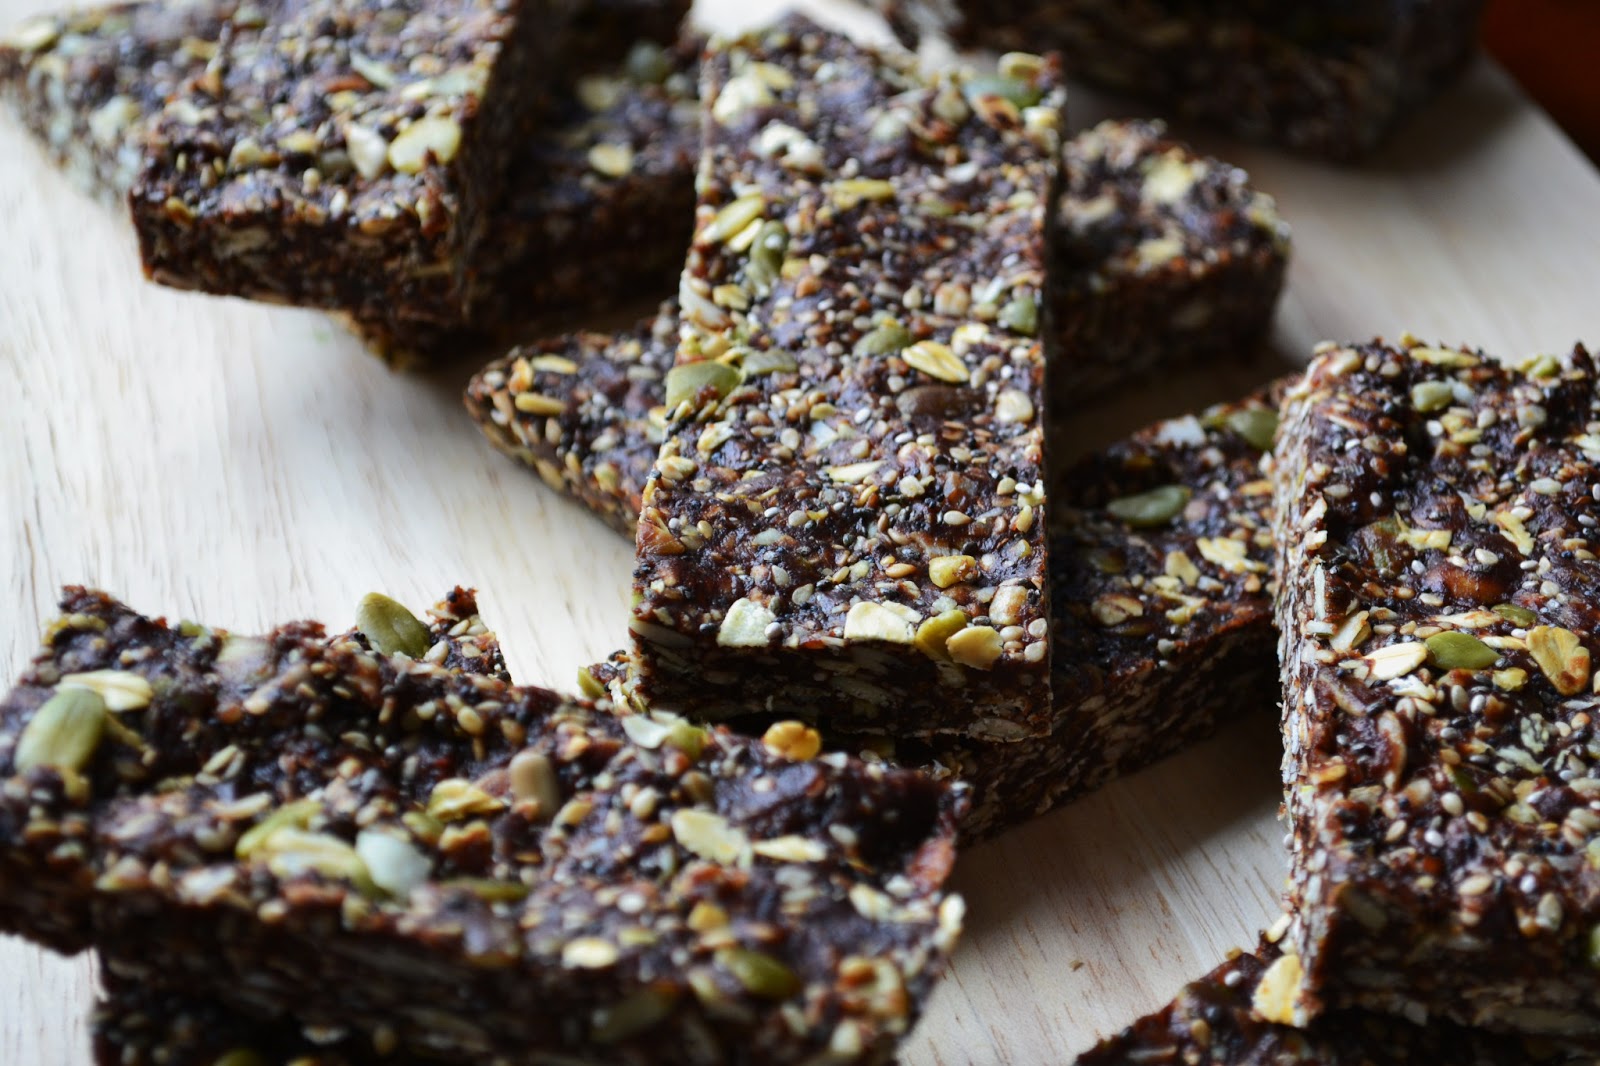
Raw Superfood and Seed Energy Bars


I have a treat for you today, dear readers. These raw superfood energy bars are sure to make your body sing with happiness. They are packed with some pretty darn healthy ingredients and I'm here to highlight some of those right now. Ready for it?
Pumpkin Seeds- Pumpkin seeds are an incredible source of iron and are an excellent source of  essential fatty acids that promote good prostaglandin production. They are also super high in zinc and are used as a popular nutritional treatment for prostate problems.

Sesame Seeds- Sesame seeds are one of the highest plant-based sources of calcium and iron. They contain both essential and non-essential amino acids.

Chia Seeds- Chia seeds were once used by Aztec warriors as an energy booster and are an incredible source of plant-based omega 3 fatty acids and protein. The are also a great source of soluble fiber, which makes them promote a clean digestive tract and regular bowel movements. Awesome!

Bee Pollen- A true superfood, bee pollen contains all of the essential components of life and is a complete protein. It is considered an energy and nutritive tonic in Chinese medicine. Cultures throughout the world use it in a number of applications, including extending longevity, improving endurance and vitality, aiding recovery from chronic illness, and antibiotic treatments.
Raw Cacao Powder-Unlike processed dark chocolate, the antioxidants in raw chocolate are completely preserved. Out of all the foods that contain antioxidants, raw cacao is the highest in the world. It dwarfs the popular foods and beverages commonly touted as being antioxidant-rich, such as red wine, green tea, and blueberries by a factor of 10x or more! It is also the highest food source of magnesium.

Unrefined Coconut Oil- Unrefined raw coconut oil is one of the best fats you can consume. It's a saturated fat that is so nourishing to every cell in your body and even has powerful anti-bacterial, anti-viral, and anti-fungal properties.

Medjool Dates- These delicious fruits are beyond perfect in every way. They're an incredible source of potassium and are loaded with dietary fiber. Dates are natural energy boosters and they can be used in many treats to replace refined sugar. Might I add that they taste like caramel. I love dates!
Isn't it amazing that food can be so powerful and healing? It's like medicine with superpowers! Next time I make these, I'm going to add even more superfoods to the mix...maybe some goji berries, hemp seeds, and maca powder to make these bars out of this world.
Raw Superfood and Seed Energy Bars (adapted from this great recipe at Green Kitchen Stories)
Makes around 16 bars 

Dry ingredients
1 cup  pumpkin seeds
1 cup dried shredded coconut
1/2 cup  sesame seeds
1/2 cup sunflower seeds
4 tbs chia seeds
2 tbsp bee pollen (optional)

Wet ingredients
20 fresh medjool dates, pitted
6 tbsp coconut oil, room temperature
4 tbsp raw cacao powder
1 whole vanilla bean, cut into pieces (including the pod) or 1 teaspoon vanilla extract

Add after blending
6 tbsp rolled oats
2 tbsp poppy seeds

1. In a food processor or high speed blender, pulse the dry ingredients quickly. Do not over-process, you want it a little crunchy. Place the mixture in a bowl and set aside. Add half of the dates and the rest of the wet ingredients to the food processor. Run the processor for 30 seconds, then add the rest of the dates one at a time while the machine is running until the mixture is smooth. You might have to help out by stirring around a few times with a fork or add a dash of water.

2. Pour the wet ingredients over the dry ingredients, add oats and poppy seeds and stir until well combined (I used my hands to really get the mixture well combined!). Press the mixture evenly into a 11 x 7-inch  baking dish, make sure it becomes quite compact. Place in the fridge for about 30 minutes. Cut into bars. Wrap them in paper and store in an air-tight container. Will keep around a week in the fridge.


For more fabulous food and photos from Nourish The Roots, 
be sure to follow on Facebook, Instagram, and Pinterest

Monday, February 25, 2013

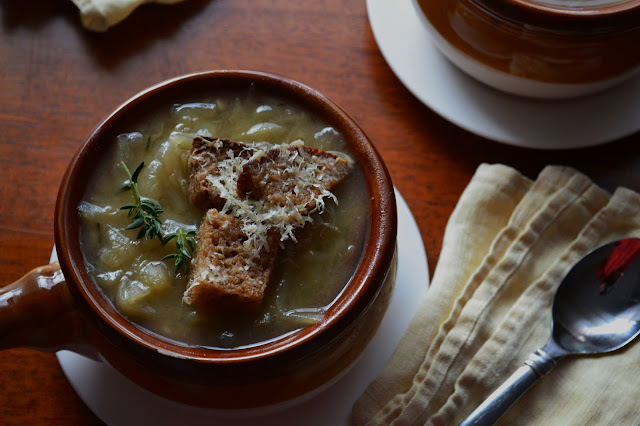
Vegetarian French Onion Soup with Dijon Gruyere Croutons


Sometimes, you just need some comfort food. Anyone with me on this one? It has been one of those weeks. Remember that strange feeling of "not belonging" that I wrote about not too long ago? Yeah, I'm still feeling it. So I realized that I needed something that would warm my insides and make me happier. And there's nothing happier than some French onion soup with some cheesy goodness on top.

I decided to spend my precious day off from work today in the kitchen making this here soup. So surprising, right? Let's just say I spent the afternoon crying. Ok, I'm not that depressed people, it's just that when you have to peel and slice practically a whole bag of onions to make this soup, you just can't avoid shedding some tears. But all that crying was worth it.

You'll notice in the recipe below that I use a homemade vegetable stock. I haven't bought a box of packaged vegetable broth in years. I have practically eliminated all packaged items from my kitchen, and that includes those boxes of vegetable broth. I've been playing around recently with making different variations of vegetable stocks using everything from mushrooms to winter squash and the results have been great. The all-purpose stock recipe that I used in this soup is extremely simple and straightforward. I bet you probably have all of the ingredients in your kitchen right now. If you are going to use packaged broth, be sure it's organic and doesn't have any questionable ingredients in it.
I understand that a bowl of soup of the French Onion variety typically has lots of ooey gooey melted cheese bubbling over the sides of the bowl. And when times are tough, there's nothing wrong with that. But these croutons I tell ya, they're good. You see, my husband is not a fan of ooey gooey cheesy things, so I had to compromise on this one and skimp on the cheese. And honestly, the croutons were awesome, so I wasn't disappointed in the slightest.

Vegetarian French Onion Soup with Dijon Gruyere Croutons (serves two generously)

For the Soup:
8 yellow onions, thinly sliced
5 cloves garlic, chopped
2 tablespoons butter (or olive oil if you want the soup to be vegan)
3 bay leaves
5 sprigs of fresh thyme
1/2 tsp sea salt
3/4 cup dry sherry wine
2 tablespoons dijon mustard
3 cups vegetable broth (preferably homemade, see recipe below)

1. In a large pot over medium heat, add butter (or olive oil), onions, garlic, bay leaves, thyme, and sea salt. Stir to combine and when onions start to soften, lower the heat. Let the onions slowly cook, stirring occasionally, about one hour until they are caramelized and brown and melt-in-your-mouth delicious. Remove the thyme sprigs and the bay leaves.

2. Add the sherry to the pot and cook another 10 minutes. Then add the dijon mustard and vegetable broth. Stir and let simmer another 10 minutes. Taste and add salt if you think it needs it. Ladle into bowls and top with croutons.

For the Croutons:
2-3 large slices rustic whole grain bread, cut into 1" cubes
2 tablespoons olive oil
2-3 tablespoons dijon mustard
pinch of sea salt
1/4 cup finely grated Gruyere or Swiss cheese (optional if you want to keep the soup vegan)

1. Preheat oven to 350. In a bowl, combine all of the ingredients and toss to coat the bread cubes. Lay the bread cubes on a parchment-lined baking sheet and bake for 10-12 minutes until the croutons are golden brown and sizzling. Remove from the oven and top the bowls of soup with croutons and an extra sprinkling of cheese.

Quick and Easy Homemade Vegetable Stock (makes 4-5 cups of stock)
3 large carrots, cut into 1" pieces
1 large onion, cubed
3 stalks celery, cut into 1" pieces
6 cloves garlic, each peeled and cut in half
2 bay leaves
fresh or dried herbs of your choice (I like parsley, rosemary, and thyme)

In a pot, add all of the ingredients and cover with 6 cups water. Bring to a boil and reduce to a simmer. Let simmer uncovered for one hour or more. Strain through a fine mesh strainer before using.


For more fabulous food and photos from Nourish The Roots, 
be sure to follow on Facebook, Instagram, and Pinterest

Thursday, February 14, 2013

Super Delicious Homemade Kimchi


I am a self-proclaimed kimchi addict. The first time I ever tried it was at my favorite sushi restaurant in New York rolled up into a nori roll. The kimchi was made by the restaurant owner's wife, who was the sweetest Korean lady. The moment I tried her kimchi, it was love at first bite. I would have weekly cravings for her kimchi rolls and every time I ate one, I was totally blissed out. And to be honest, I've tried lots of kimchi since then, and none even come close to the flavor of hers. But put some kimchi, any kimchi, in front of me, and I'll still eat it all up in no time.
So what is a kimchi addict supposed to do when they end up spending seven dollars a jar on the stuff, only to have it disappear within a few short days? Make lots of homemade kimchi, of course! It's actually incredibly easy to make and is so much cheaper than buying it. And you get to have total control when it comes to ingredients.

I understand that some of you have no clue what kimchi is. Or maybe you do, and I'm just underestimating your intelligence. But it was a fairly new condiment to me up until 2 years ago when I tried those beloved kimchi rolls at the sushi restaurant. Anyway, kimchi is a traditional Korean condiment made with little more than Napa cabbage, some vegetables (even fruit!) of your choice, ginger and garlic, and spicy red pepper. These ingredients are all mixed together with some sea salt and fish sauce (or you can omit the fish to make vegan kimchi, which is still delicious) and packed into jars to ferment. Yes people, I said ferment. Yup, you leave the jars out on your countertop for about a week and the salty vegetables soon turn into a tangy, spicy, irresistable condiment teaming with beneficial bacteria.
Why are fermented foods, like kimchi, so freaking good for you? Well, like I said above, they're filled with beneficial bacteria that do miracles for your digestive health, and overall health, really. Probiotics (good bacteria found in fermented foods) are responsible for promoting regular bowel movements, strengthening the immune system, normalizing skin conditions, reducing cholesterol, maintaining bone health, and managing blood sugar levels. Also, the vitamin content of the raw fermented vegetables is actually increased the longer they ferment. By eating fermented foods, you're basically getting what you would get in a probiotic supplement, but in a food form, which is always better, in my opinion. Some other whole food sources of probiotics include lacto-fermented sourkraut and pickles, miso, yogurt, kombucha, kefir, and lots more!

Be sure to check out two great books all about fermentation, 'Wild Fermentation' and 'The Art of Fermentation', both by Sandor Ellix Katz. And, there are lots of fabulous food blogs and articles out there with incredible fermented food recipes, so just do some googling and you're on your way!

Kimchi
1 large head Napa cabbage, cut into bite sized pieces
2 baby bok choy, cut into bite sized pieces
3 large carrots, grated
1 daikon radish, julienned
1/2 of an onion, thinly sliced
1 apple, grated
5 scallions, cut into 1" pieces
7 cloves garlic, peeled
3" piece of ginger, peeled and cut into pieces
1/4 to 1/3 cup crushed red chili flakes, depending on how much heat you like
1/4 cup fish sauce (optional if you want to make it vegan)
1/4 cup unrefined sea salt

1. In a very large bowl, add the Napa cabbage, bok choy, carrots, daikon radish, apple, scallions, and onion.

2. Add the garlic, ginger, and red chili  to a food processor. Process until it forms a paste. Add this paste to your big bowl of vegetables.

3. Add salt and fish sauce to the bowl and massage everything with your (clean!) hands for 4-5 minutes until the vegetables start to break down and there is liquid forming at the bottom of the bowl.

4. Transfer the kimchee to one very large clean jar (or a couple of clean smaller jars), making sure to pack the vegetables in firmly, submerging them in brine. Make sure to leave at least 1 inch of free space at the top of the jars before securing the lids.

5. Leave the jars out on your countertop or in your pantry for a few days, periodically unscrewing the lids slightly to let out carbon dioxide. Also, I made sure to push the vegetables down under the brine with a clean fork every other day. After 3 days, you may begin to taste your kimchi. I liked the way mine tasted after 7 days, but feel free to let it go longer to get it really sour. When it is good and tangy to your liking, transfer the jars to the refrigerator where the kimchi can keep for months.


For more fabulous food and photos from Nourish The Roots, 
be sure to follow on Facebook, Instagram, and Pinterest

Monday, February 4, 2013

Za'atar Spiced Kale and Squash Salad

You know you've created something special when you've eaten the same thing for dinner three nights in a row and still haven't gotten tired of it. Yeah, that's this kale salad alright. It's that delicious, my friends. It's pretty, too.
It's no secret that I'm a huge winter squash and sweet potato fan. If you take a look at many of the recipes on the blog, you're bound to find those vegetables in one way or another. So you can imagine my delight when I discovered these adorable little squashes at the local farmers market. They're called Golden Nugget Squashes and they're just perfect because they're so sweet and you don't even have to peel them. And they're tiny, meaning that I don't have to wrestle with a four pound squash trying to cut it open without chopping a finger off.
But you want to know the real kicker in this recipe that gives it mega flavor? It's called za'atar and it is your new best friend, even if you've never tried it before. Trust me. Za'atar is a Middle Eastern spice blend commonly made up of sumac, thyme, sesame seeds, oregano, and salt. The sumac in the blend gives it this tangy, citrusy flavor that's just incredible. You can buy za'atar spice blend in stores that have  a good spice and herb section, or you can make the blend yourself. Sarah and Heidi have recipes on their blogs that are a good starting point. I bought my particular blend and I'm very pleased, but when it runs out, (which will no doubt will be in a couple days because I'm putting it on everything) I'm going to try to make it myself.
Sprinkle za'atar on a halved avocado as a killer snack, or on a poached egg, or on a freshly made batch of hummus. Add it to a fresh tabbouli salad. I've even seen it stirred into plain yogurt. Seriously, it's probably good in or on everything.
 I'll stop ranting about this salad soon, I promise. But one more thing. If you look below at the recipe, you'll see that I tell you to massage the raw kale to tenderize it. And I mean just that. Take both your  (clean!) hands into that bowl of kale, lemon juice, olive oil, and salt, and show it some love! You'll be amazed at how the kale just wilts and tenderizes as if it was cooked. So I recommend if you want to incorporate raw kale into you diet (which you most definitely should!), but aren't a fan of its fibrous texture, just give it a massage.

Za'atar Spiced Kale and Squash Salad

3 small golden nugget squashes or 3 small sweet potatoes (I've used both with great success),  unpeeled and cut into 1 1/2 inch cubes
1 onion, peeled, halved, and very thinly sliced
3 large garlic cloves, finely chopped
olive oil
sea salt
1 bunch kale, de-stemmed and cut into thin ribbons
juice of half a lemon (about 2-3 tablespoons juice)
1/2 bunch of cilantro, roughly chopped
1/3 cup pumpkin seeds, lightly toasted in a hot skillet until they start to pop
2 1/2 tablespoons za'atar spice blend, or more to taste

1. Preheat oven to 375. In a mixing bowl, combine the cubed squash, sliced onion, chopped garlic, a large pinch of salt, and 3 tablespoons olive oil. Toss well to coat the vegetables with olive oil. Pour them onto a large parchment-lined baking sheet. Bake for 20 minutes, toss, and bake for another 20 minutes, or until the squash is tender and the onions have started to caramelize.

2. While the squash is baking in the oven, combine the kale, lemon juice, a pinch of salt, and a tablespoon of olive oil in the same mixing bowl you used for the squash. Massage the kale with clean hands, until it starts to wilt and tenderize, about 1-2 minutes. Add the chopped cilantro and pumpkin seeds. Set aside

3. After removing the squash from the oven, add zatar to the still hot squash cubes and toss gently to coat them in spice. Let cool for 5 minutes, then add everything to the bowl of kale. Toss gently to combine everything. Taste to see if it needs more salt or more za'atar and serve.


For more fabulous food and photos from Nourish The Roots, 
be sure to follow on Facebook, Instagram, and Pinterest

Sunday, February 3, 2013

Vegan Pho Noodle Bowl


People weren’t kidding when they told me that Seattle is a rainy city. In the winter, the skies are gray and misty almost everyday. It’s damp and cold and pretty miserable. I find myself drinking lots of tea to get by.  Aside from its rainy reputation, Seattle is also known for its amazing Asian food, especially Vietnamese. One really popular Vietnamese meal is a noodle dish called ‘pho’, pronounced as if you’re starting to say the bad f-word and leave off the “ck”. There are Vietnamese restaurants  advertising pho all over the place here, literally on every street! Traditionally pho is made with beef broth, but I’ve seen a lot of vegetarian versions here (Seattle is really veg-friendly). On a cloudy, cold day a few weeks ago, I couldn’t pass up the opportunity to try a steaming bowl of vegetable pho. And holy crap, it was delicious. It is the perfect thing to eat on a rainy day.
I was super excited to make my own version of pho, and it did not disappoint. The smell of the simmering broth on the stove filled my entire apartment with its warm, inviting smell.  I used a bunch of warming spices that release a subtle flavor to make a delicious, savory broth. The star anise and ginger are classic additions to pho broth and all the others are an integral part in making this broth fantastic. You don’t need the beef to get that savory taste. Nope, not at all.
The vegetables are vibrant and the garnishes! Oh the garnishes! Let’s just say that Thai basil is freaking delicious.  Don’t skimp on the basil or cilantro. In addition to adding tons of nutrients, they also add so much flavor a make the soup taste so fresh.

Vegetable Pho (makes 2 very large bowls or 4 smaller bowls)

Broth:
2 large onions, peeled and roughly chopped
5 crimini, shiitake, or button mushrooms, sliced
7 cloves of garlic, each clove sliced in half
1 3” piece of ginger, sliced
1 ½ tablespoons fennel seeds
4 cardamom pods
4 star anise
7 whole cloves
1 tsp black peppercorns
1 cinnamon stick
2 tsp coriander seeds
1 Tbs sea salt
7 cups water

1.  Put all of the broth ingredients (spices, onions, mushrooms, ginger, garlic and water ) in a pot. Bring to a boil and let simmer one hour or more with the lid on.
2. Strain broth through a mesh strainer into another pot and set aside. Discard the solids.

Noodle Bowl Add-Ins:
Rice noodles
Broccoli, cut into tiny florets
Carrots, thinly sliced
Baby bok choy (or baby spinach), roughly chopped
Snow peas, sliced

Garnishes:
Thai basil, cilantro, mung bean sprouts, lime, scallions, tamari, sriracha

Assembly:
1. Cook rice noodles according to package directions. Strain them and divide them between the bowls you will be eating from.
2. Add your vegetable add-ins to the hot pot of broth.  Heat very gently on the stove just until the the broccoli turns bright green and the bok choy (or spinach) wilts.
3. Ladle the broth and vegetables into the bowls of cooked rice noodles. Garnish with lots of Thai basil, cilantro, mung bean sprouts, scallions, lime juice, tamari, and sriracha. Enjoy.


For more fabulous food and photos from Nourish The Roots, 
be sure to follow on Facebook, Instagram, and Pinterest

Sunday, January 27, 2013

Feeling in Between...and Pink Apples


Well, I can finally say that I've found my own little kitchen in Seattle. It's bright, cozy, beautiful, and just waiting for me to start creating in it. To say that the past two weeks has been crazy is a major understatement. Moving across the country is no small feat, I tell you! Our belongings arrived in Seattle from New York just three short days ago. Opening boxes full of things that once belonged in New York, and now arranging them into a whole new space feels really weird. It doesn't feel real. And it doesn't quite feel like home yet. I feel very "in-between" if that makes any sense. I hope I can feel a sense of belonging soon. What does feel like home is preparing food again. Having my familiar kitchen tools and cooking beautiful food will help ground me. I'm looking forward to creating again. It feels like it's been forever since I've done that. And being back here on the blog is already making me feel at ease.
 I had to share these apples with you today. I found these beauties at an organic co-op and just had to buy them. They're a local heirloom variety apple. Their skin and flesh are the most beautiful shade of rosy pink and their flavor is quite mellow. They make me smile. And that's a good thing.


For more fabulous food and photos from Nourish The Roots, 
be sure to follow on Facebook, Instagram, and Pinterest

Sunday, January 13, 2013

I'm Still Here

I just want you all to know that I thoroughly miss posting here on the blog through this huge transition process of moving to the Pacific Northwest. I can't wait until I can say that I have my own little kitchen to start creating beautiful food again to share with you. I have an endless supply of cooking inspiration just waiting to be shared with the world. My first two days of being in Seattle have been overwhelmed with amazing food experiences. This sure is a foodie city and I'm excited to be a part of it. Between the produce and fresh fish at the world famous Pike's Place Market to the multitude of health food co-ops, boutique herb and spice stores, plus all of the ethnic food stores, I'm in food heaven! I can't wait to get back in the kitchen and create. In the meantime, please be patient with me. I'm still here.

 
For more fabulous food and photos from Nourish The Roots, 
be sure to follow on Facebook, Instagram, and Pinterest